Maker Residency: Educational Toy Series
Project type
Electronics prototyping, laser cutting, 3D printing, ideation
Role
Lead Prototyper and Designer
Date
January 2019 - December 2019
Overview
As the University of Washington’s first Maker-in-Residence, I had free reign to invent using the campus makerspaces. Following my passion for teaching kids about STEM, I created a series of educational toys. These toys teach about electronics, engineering, and digital fabrication. They are made with low fidelity materials to make it more accessible to kids and faster to build. The first project, the Hangry Angler, won runner-up in an Instructables contest. This case study highlights my rapid prototyping skills that I often also use in conjunction with user research projects.
The Motivation
As the University of Washington’s first Maker-in-Residence, I had free reign to invent using the campus makerspaces. I have always been passionate about teaching young kids, especially girls, about engineering. I have been a NASA Girls and Boys Program Mentor and a STEM speaker at several schools. I decided to use this passion to inspire my residency project. I created a series of educational toys using low-fidelity, rapid prototyping techniques that kids can recreate to learn about engineering and the tools in a makerspace.
The Hangry Angler, a lo-fi electronics project for kids to recreate and play with.
Bendables, a new kind of lego that can be reproduced with cardboard and a laser cutter.
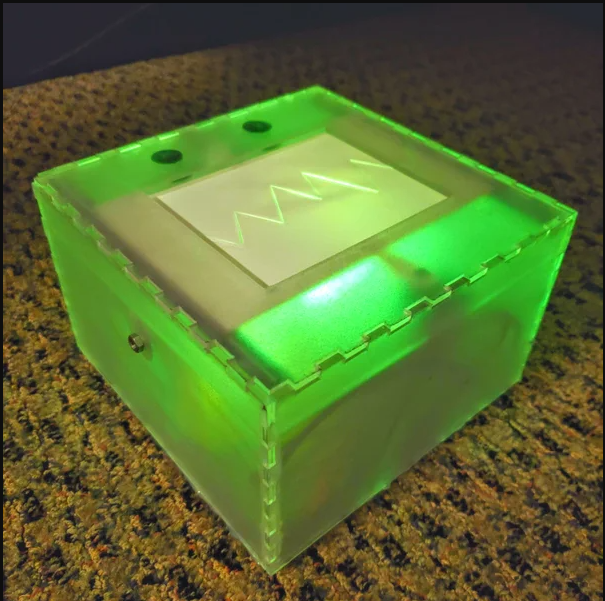
The Monster Catcher, an interactive nightlight that teaches kids about digital fabrication.
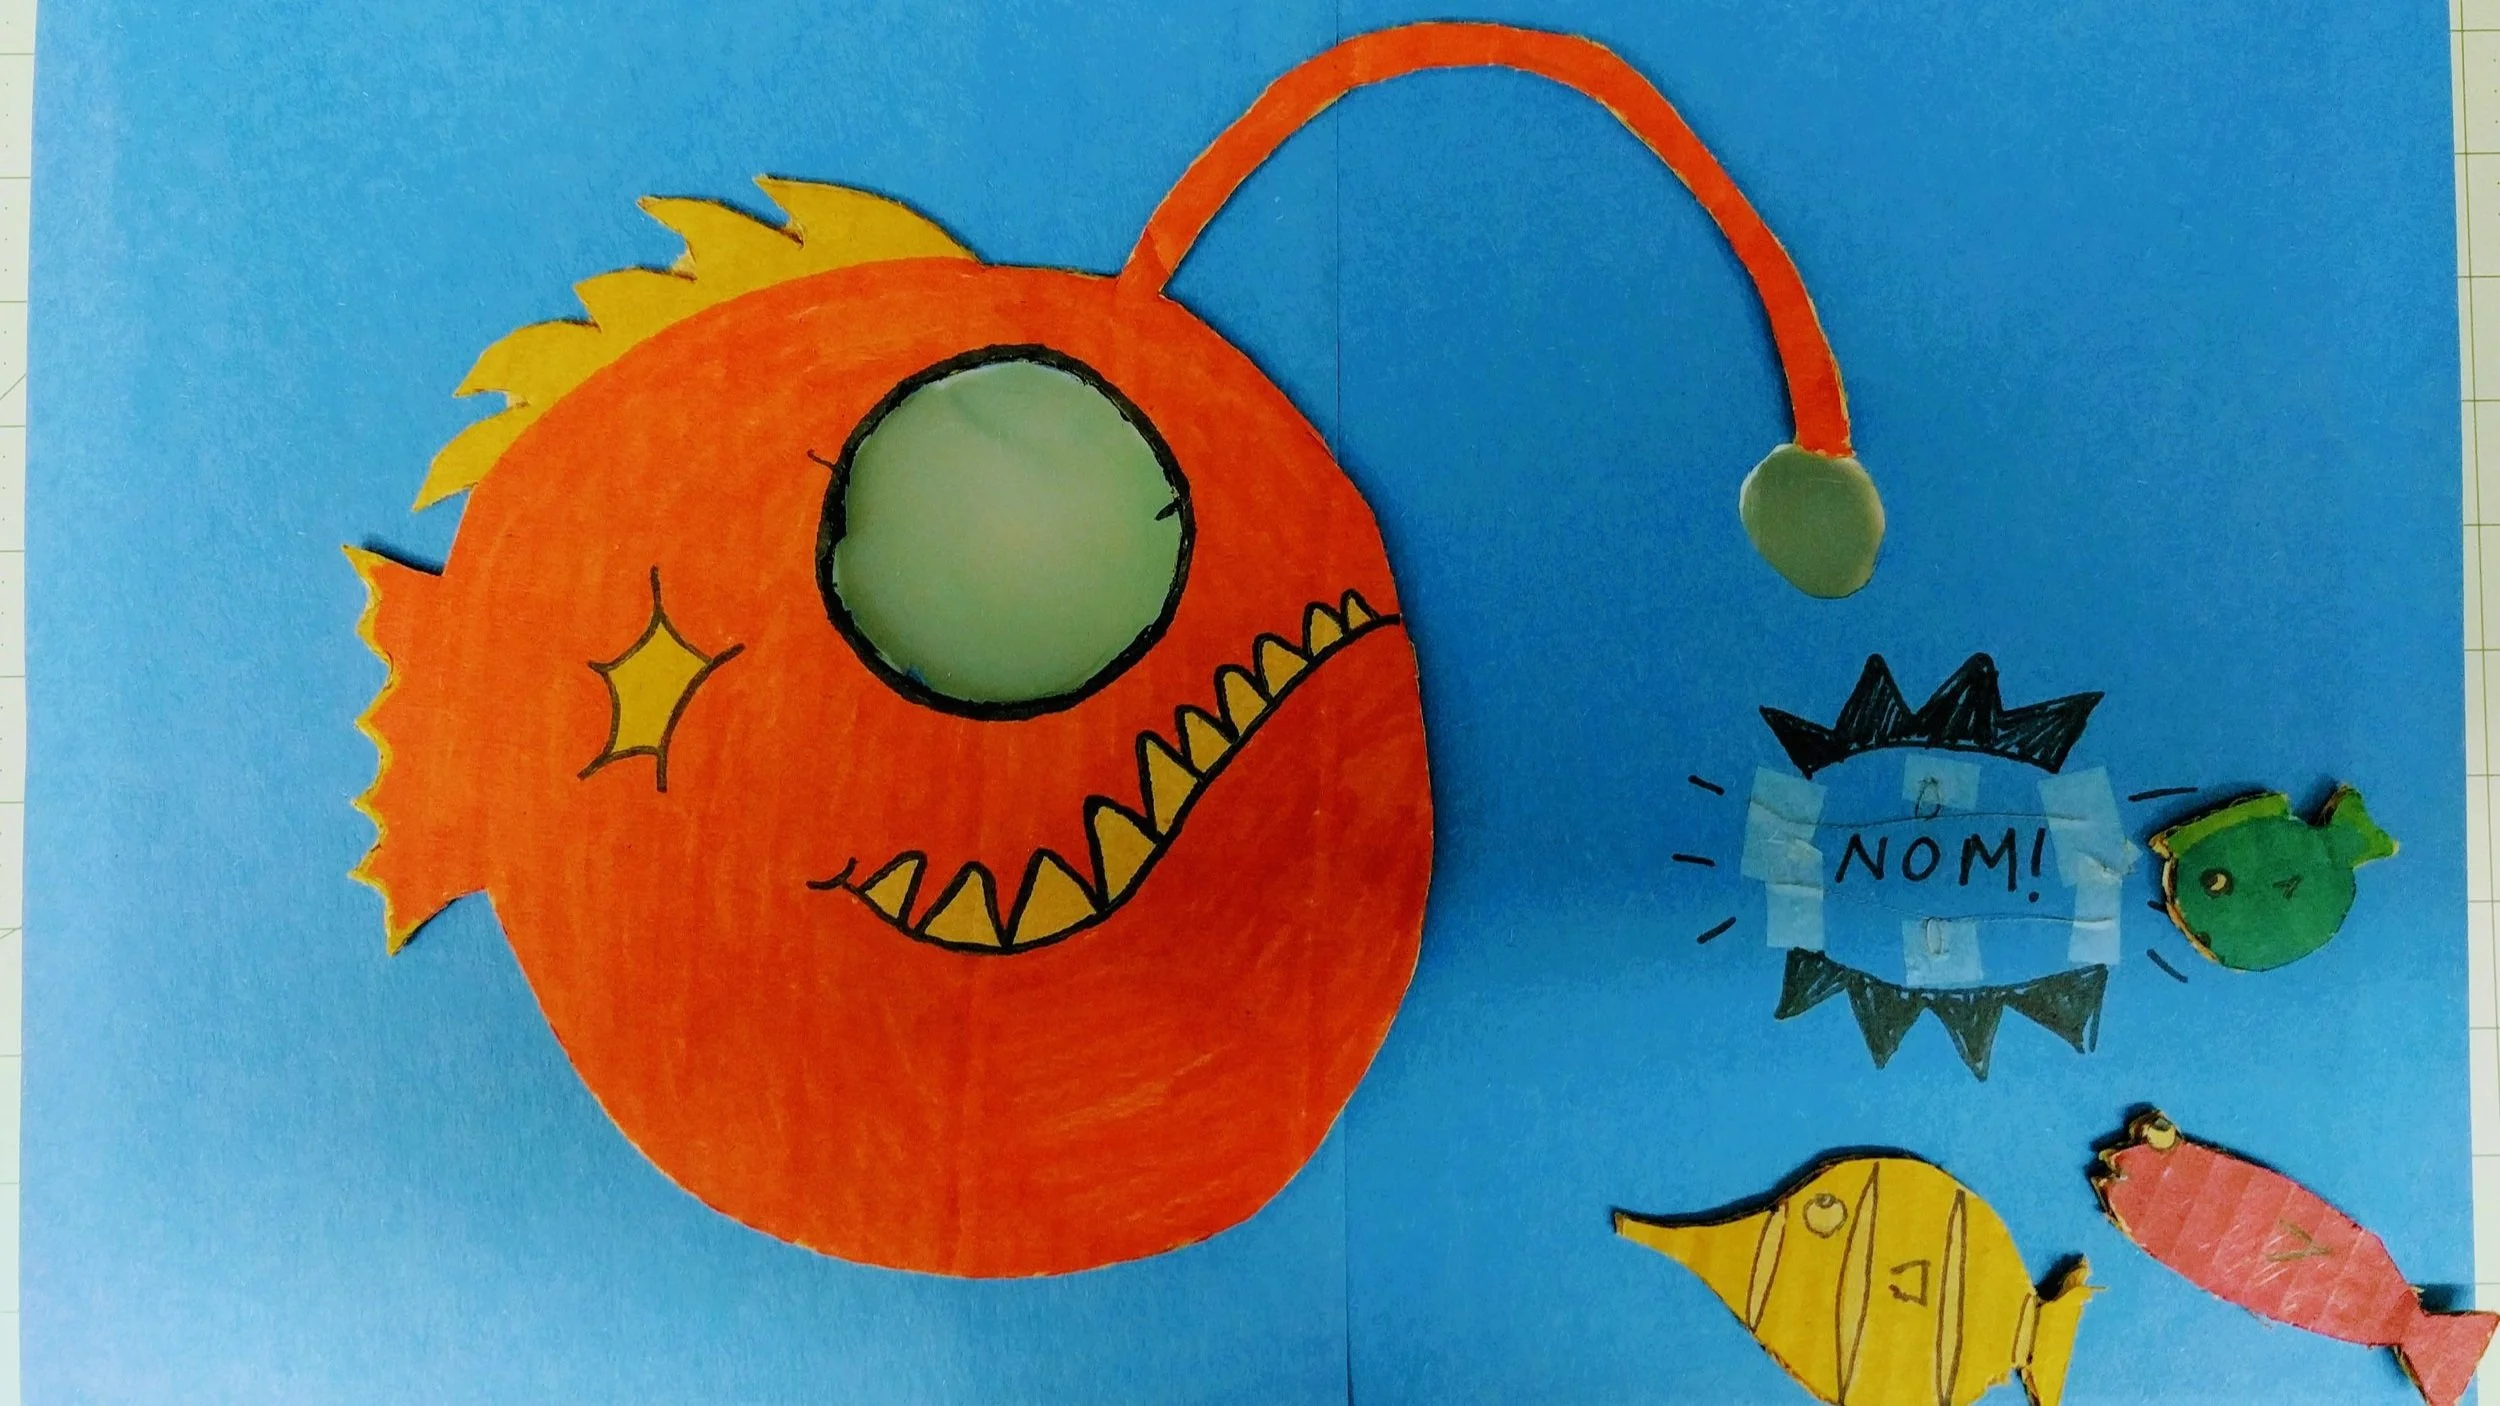
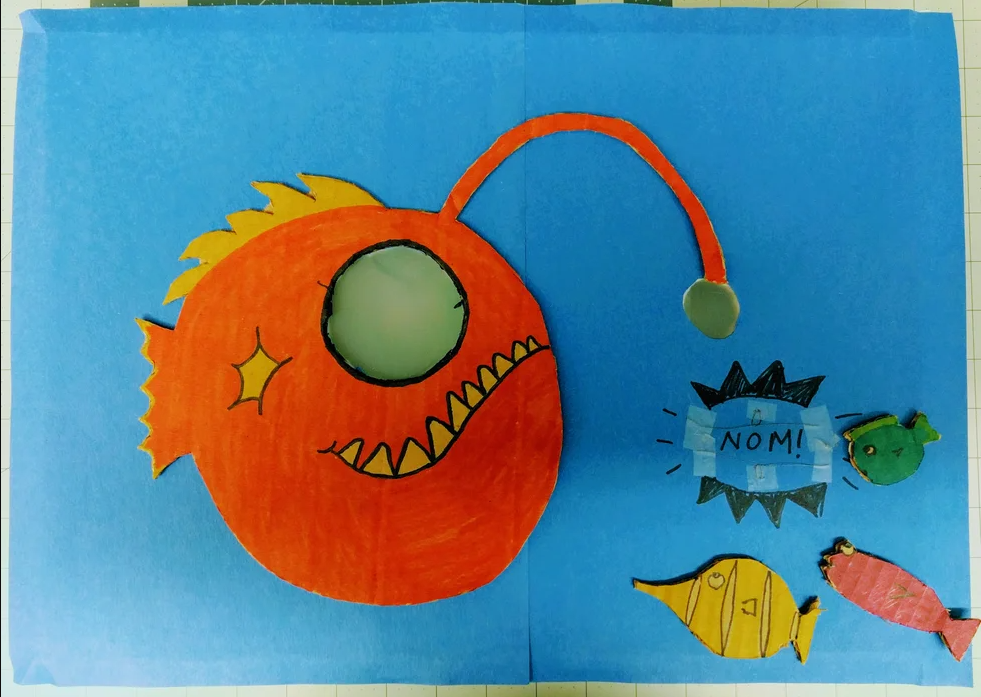
The Hangry Angler
The Hangry Angler is a low-fidelity electronics project using an Arduino and conductive ink to light up a cardboard angler fish as other fish come near it. View the whole Instructable here.
The Hangry Angler at play.
Ideation
To come with this idea, I started with lots of sketches, mostly inspired by things I enjoy. I took my scuba diving hobby and the iconic scene from Finding Nemo and came up with this idea of an Angler Fish that reacts to other fish it wants to eat.
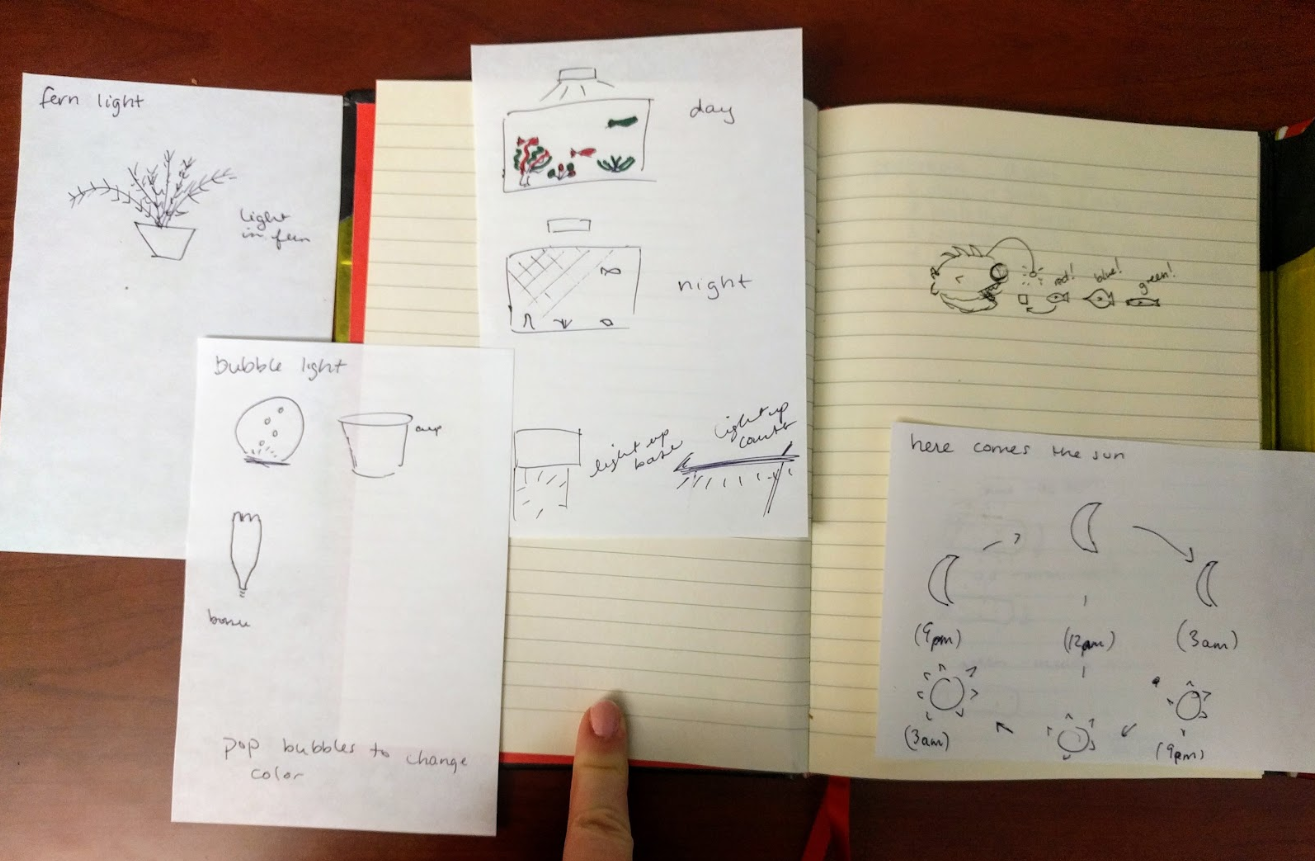
I started my ideation phase with sketching lots of different ideas for what to make.
I also did physical brainstorming by gathering lots of materials commonly found at home and playing with them to see what ideas come up.
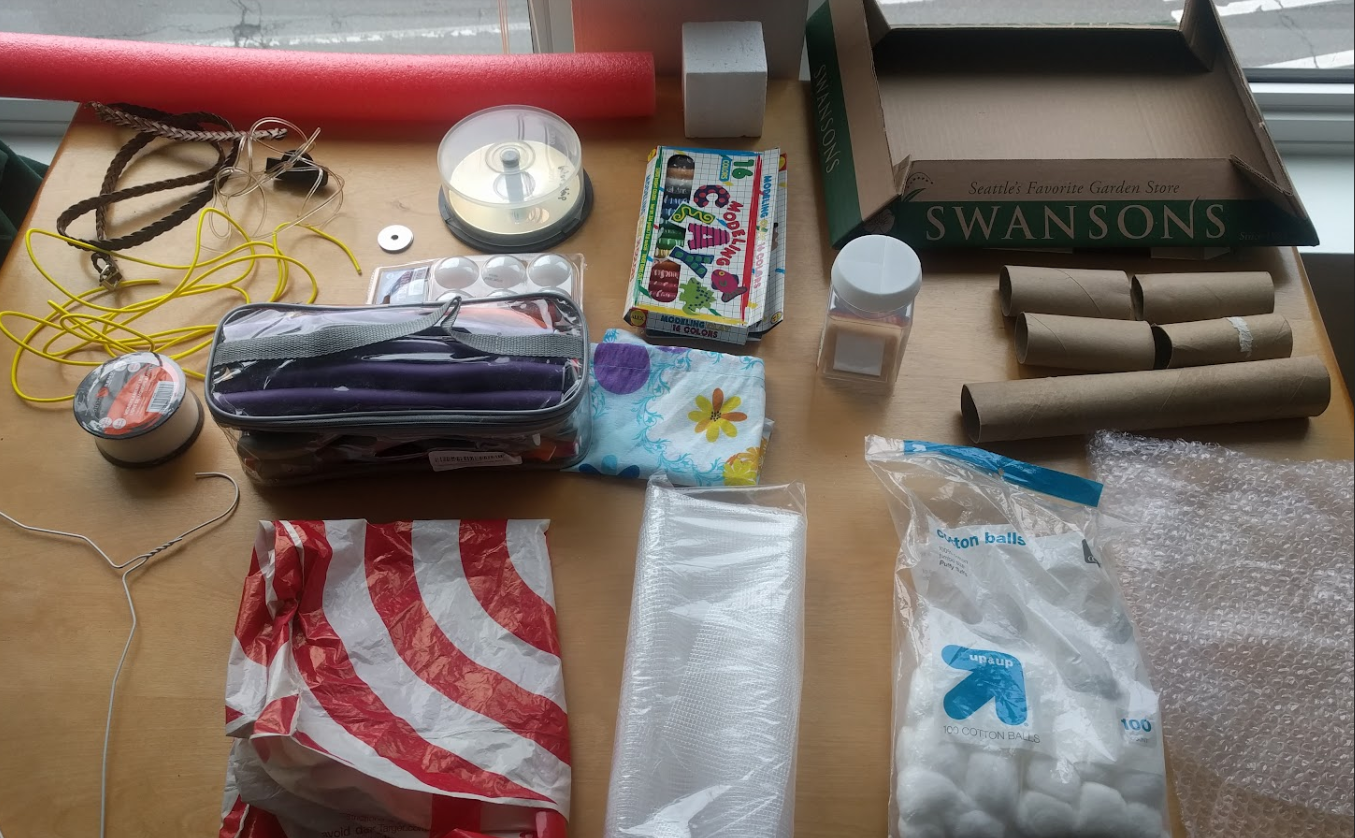
Physical brainstorming and prototyping are an important part of my process when building a physical device.
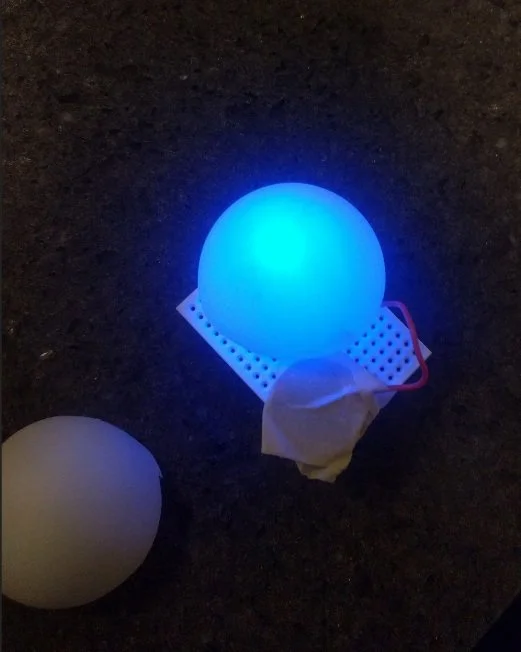
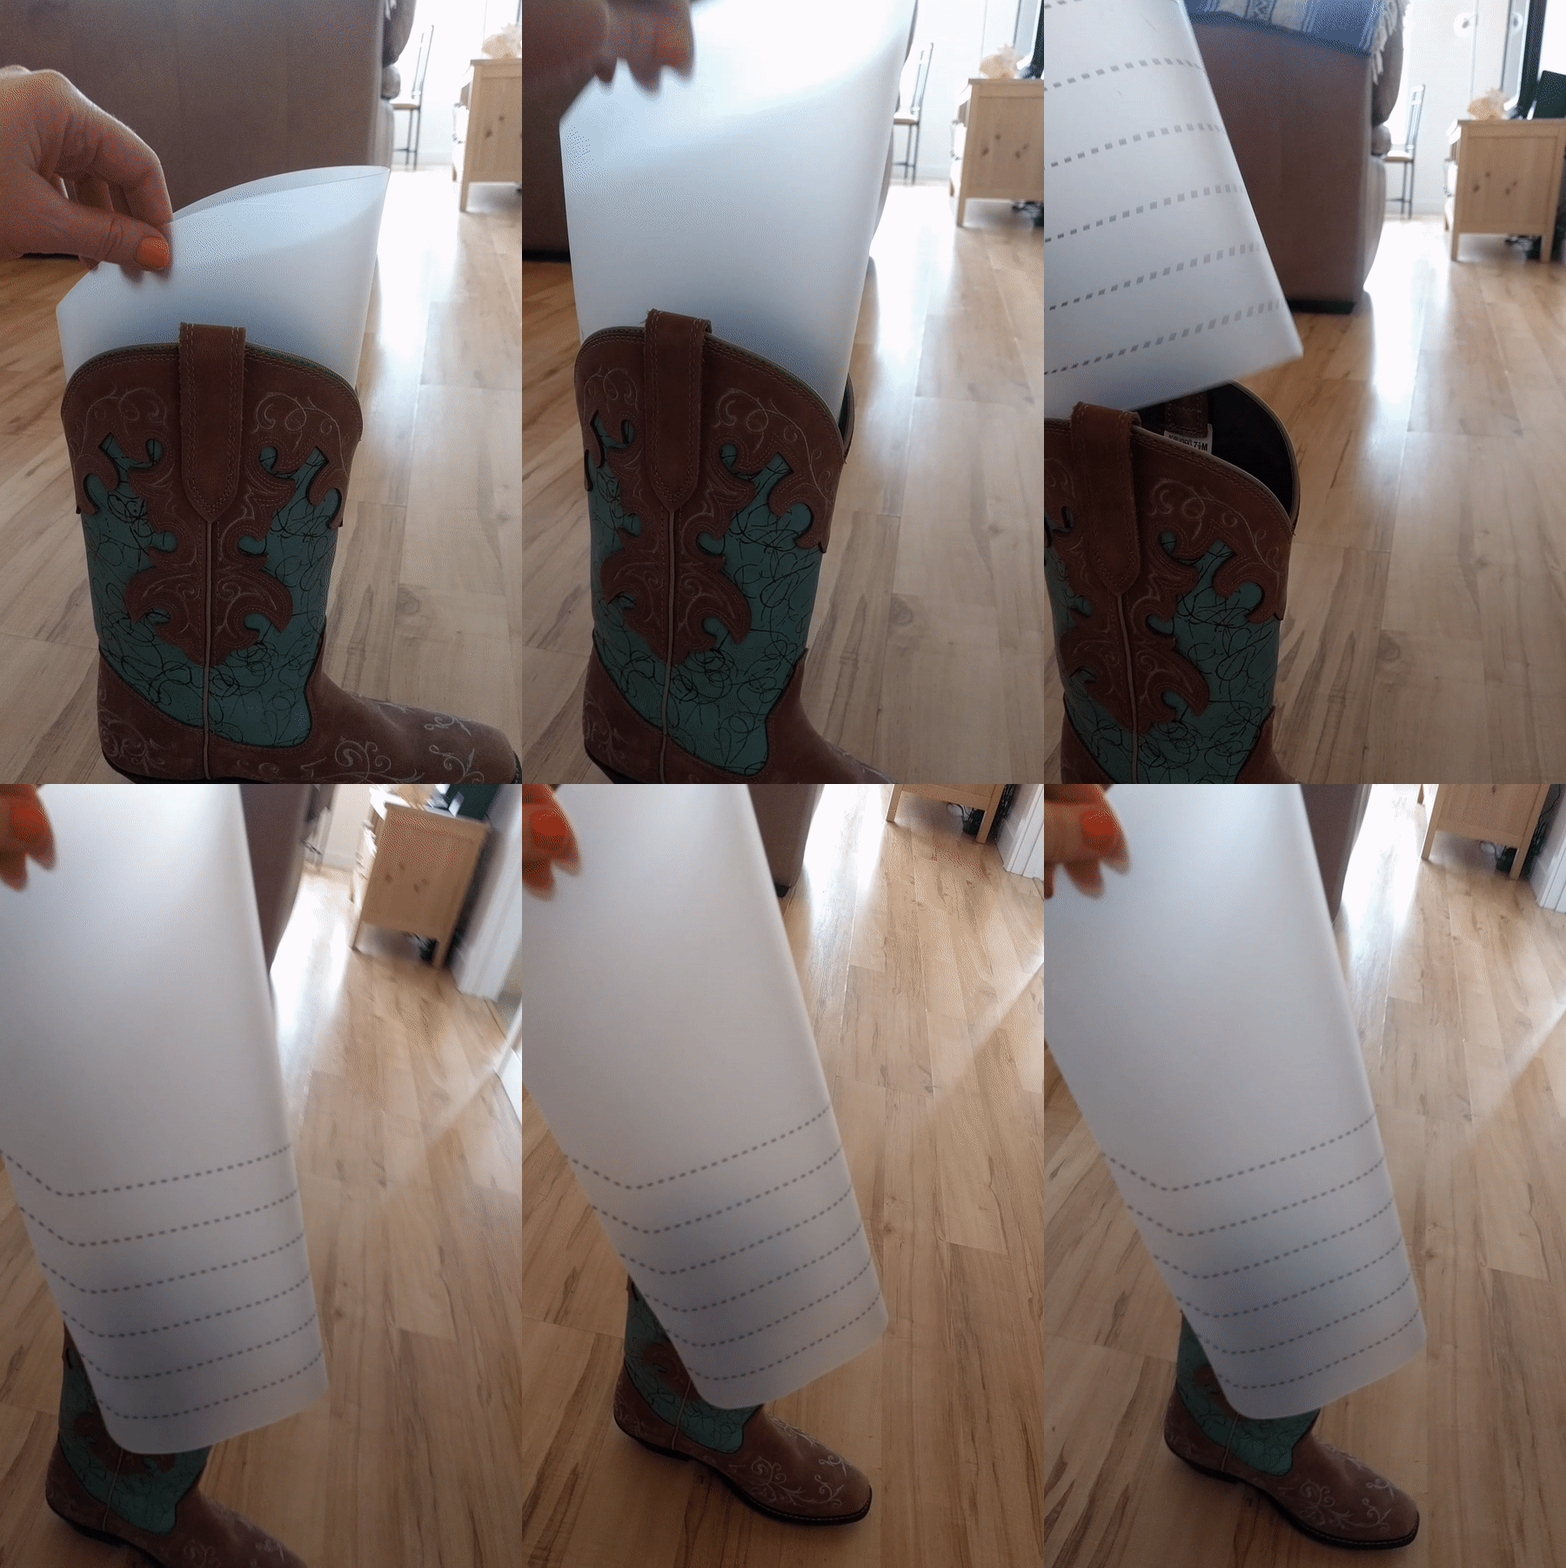
To come up with the diffuser for the LEDs of the angler, I made prototypes using many different materials. I went with the plastic from a boot filler, though any translucent, relatively stiff plastic will do.
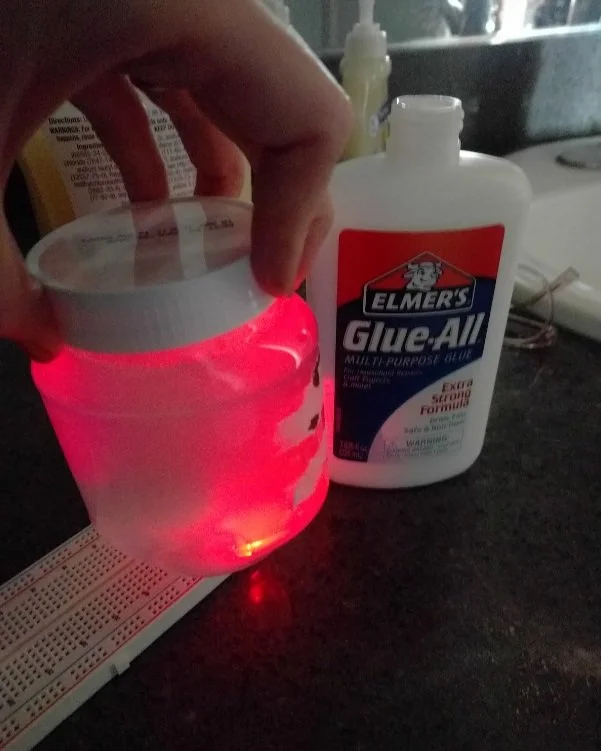
I prototyped LED diffusers out of a pingpong ball, a jar filled with glue and water, and a plastic boot filler.
Construction
The Hangry Angler has an Arduino, a beginner-friendly microcontroller, at its core. The Arduino controls two LEDs, the eye and the lure of the Angler fish. It takes in data from the fish pieces identifying which fish it is.
The angler and the fish were made of cardboard, a very accessible material, and the body of the toy was made of whatever cardboard box I had laying around.
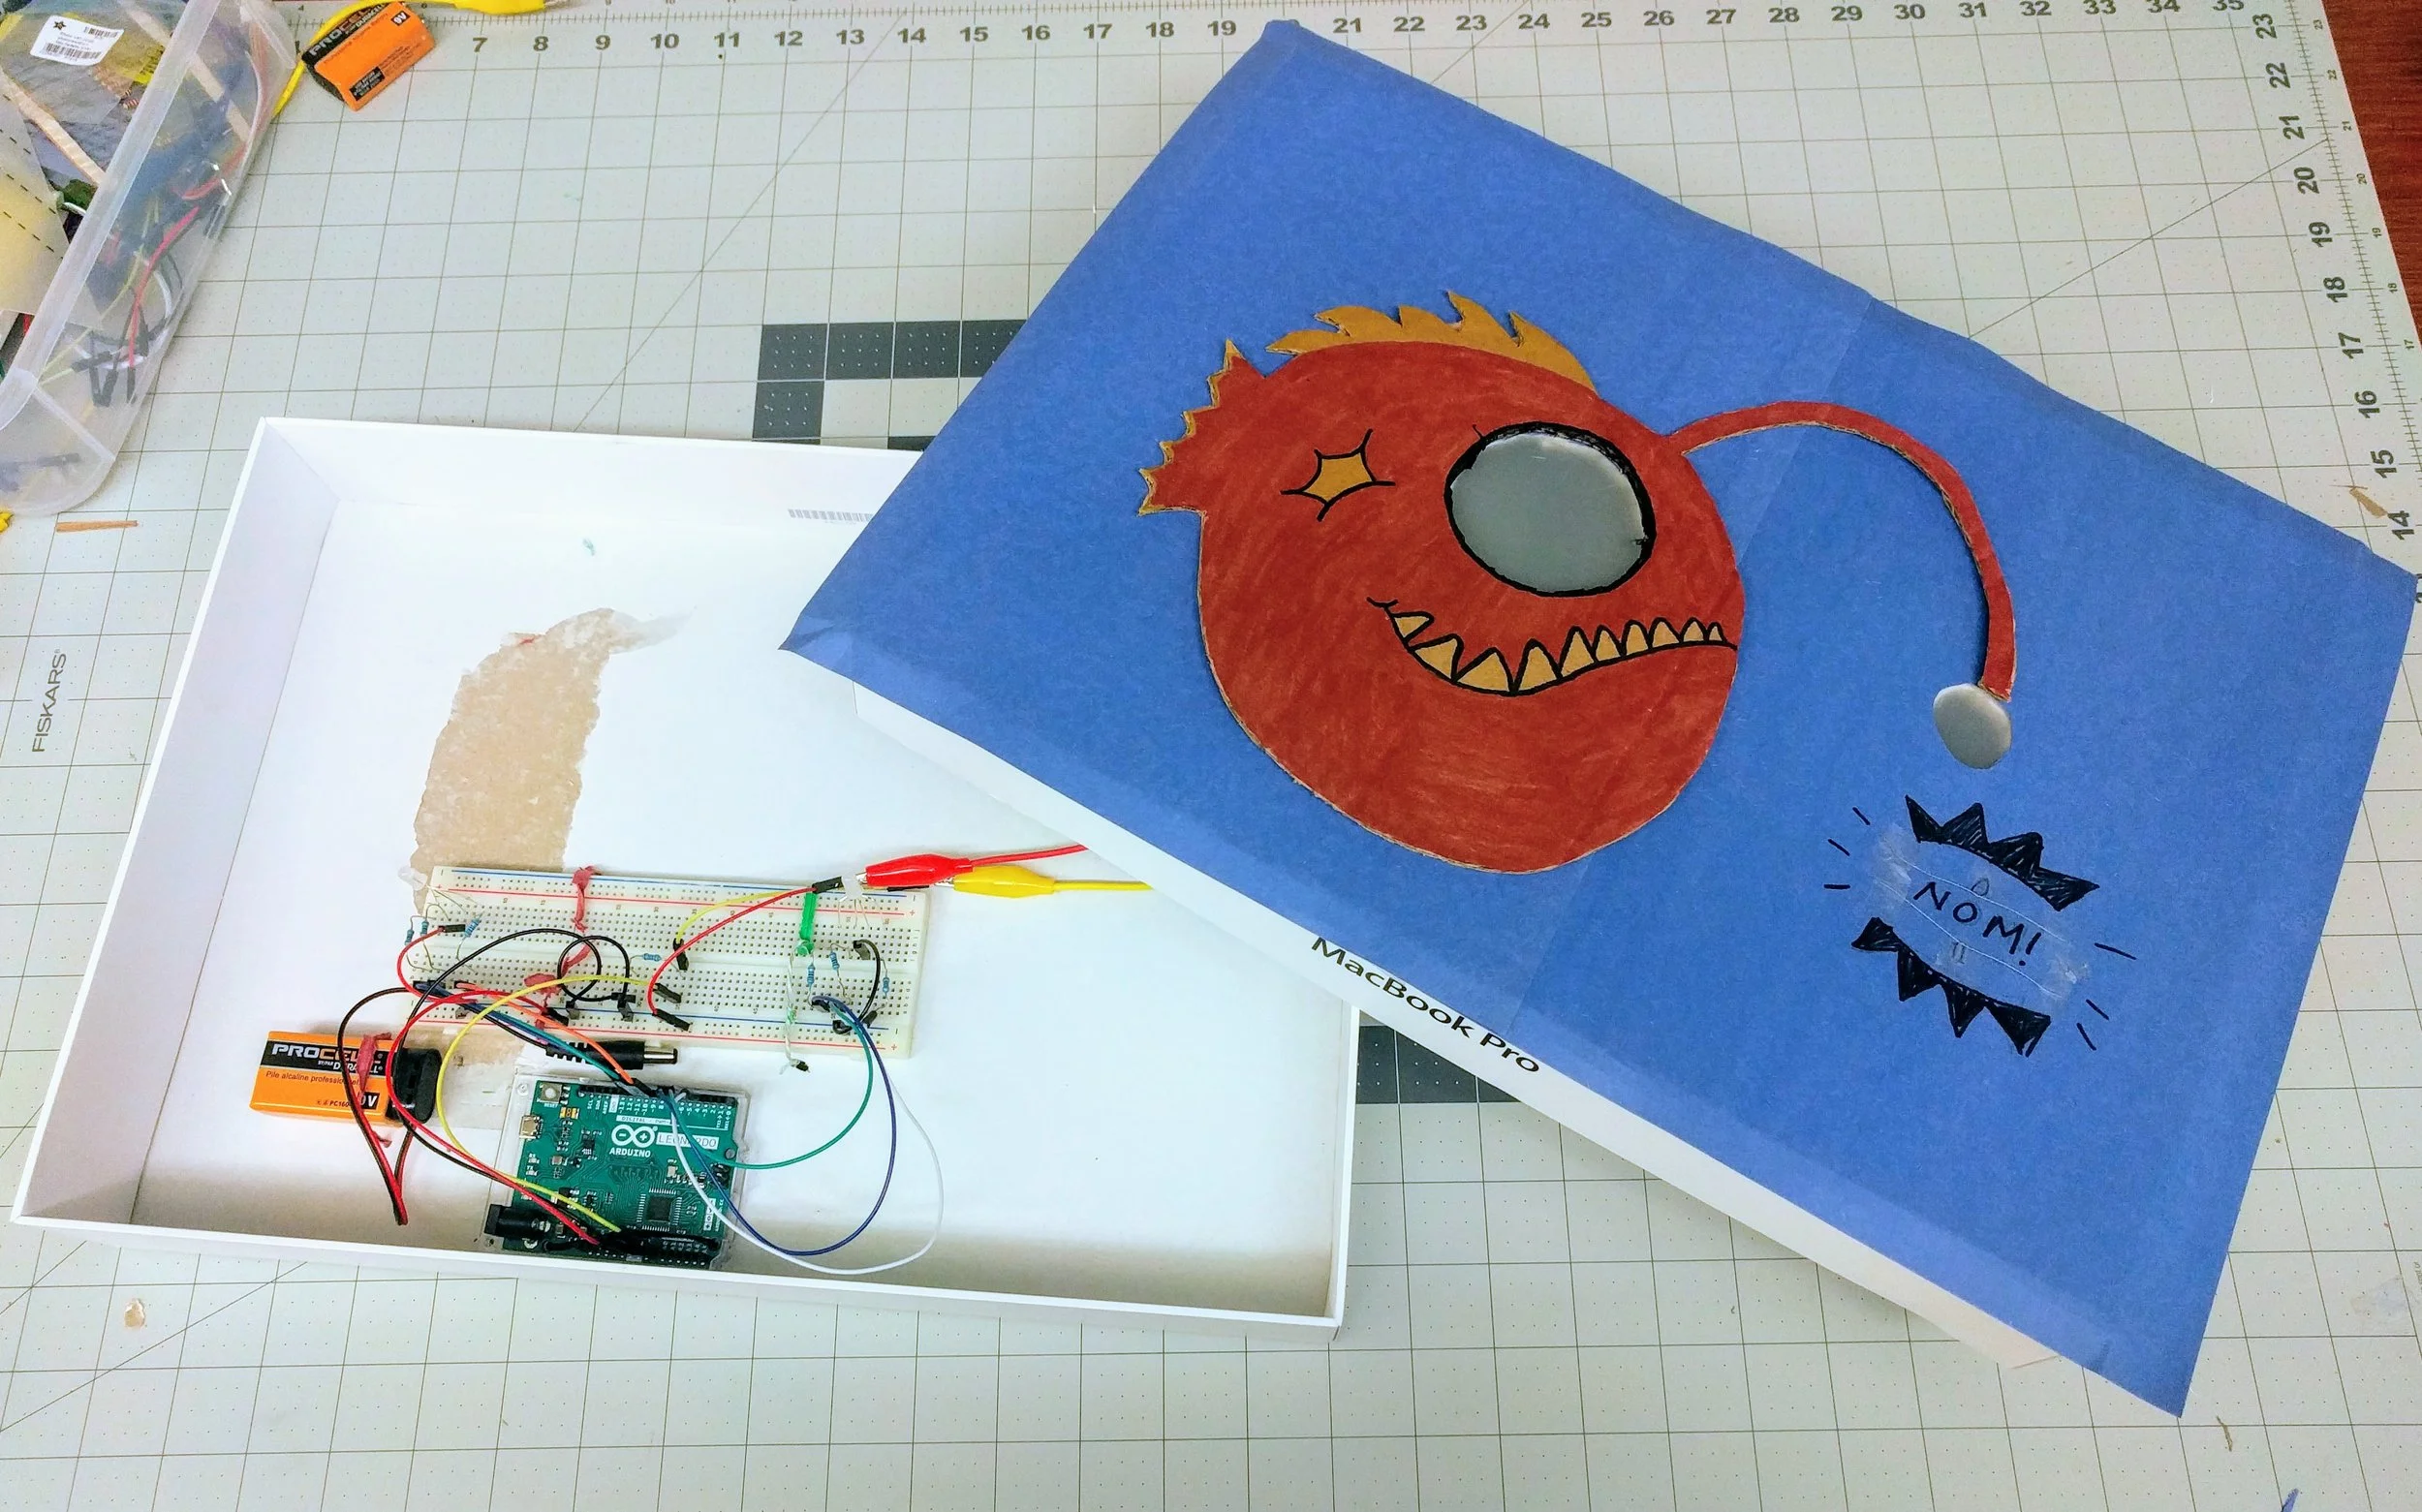
The angler and the fish were made of cardboard, a very accessible material, and the body of the toy was made of a cardboard box I had laying around.
Resistive Identifiers
Each fish has a unique conductive ink squiggle on the back of it. Each of these squiggles has a unique resistive value.


Each cardboard fish has a unique resistance value made up of a conductive ink squiggle on the back.
The spot that says NOM! in front of the angler has two ends of an open circuit made with conductive thread. This turns it into a voltage divider. When a fish’s squiggle lines up with this thread, it completes the circuit but each fish has a different resistive value that the Arduino can then use to identify the fish.
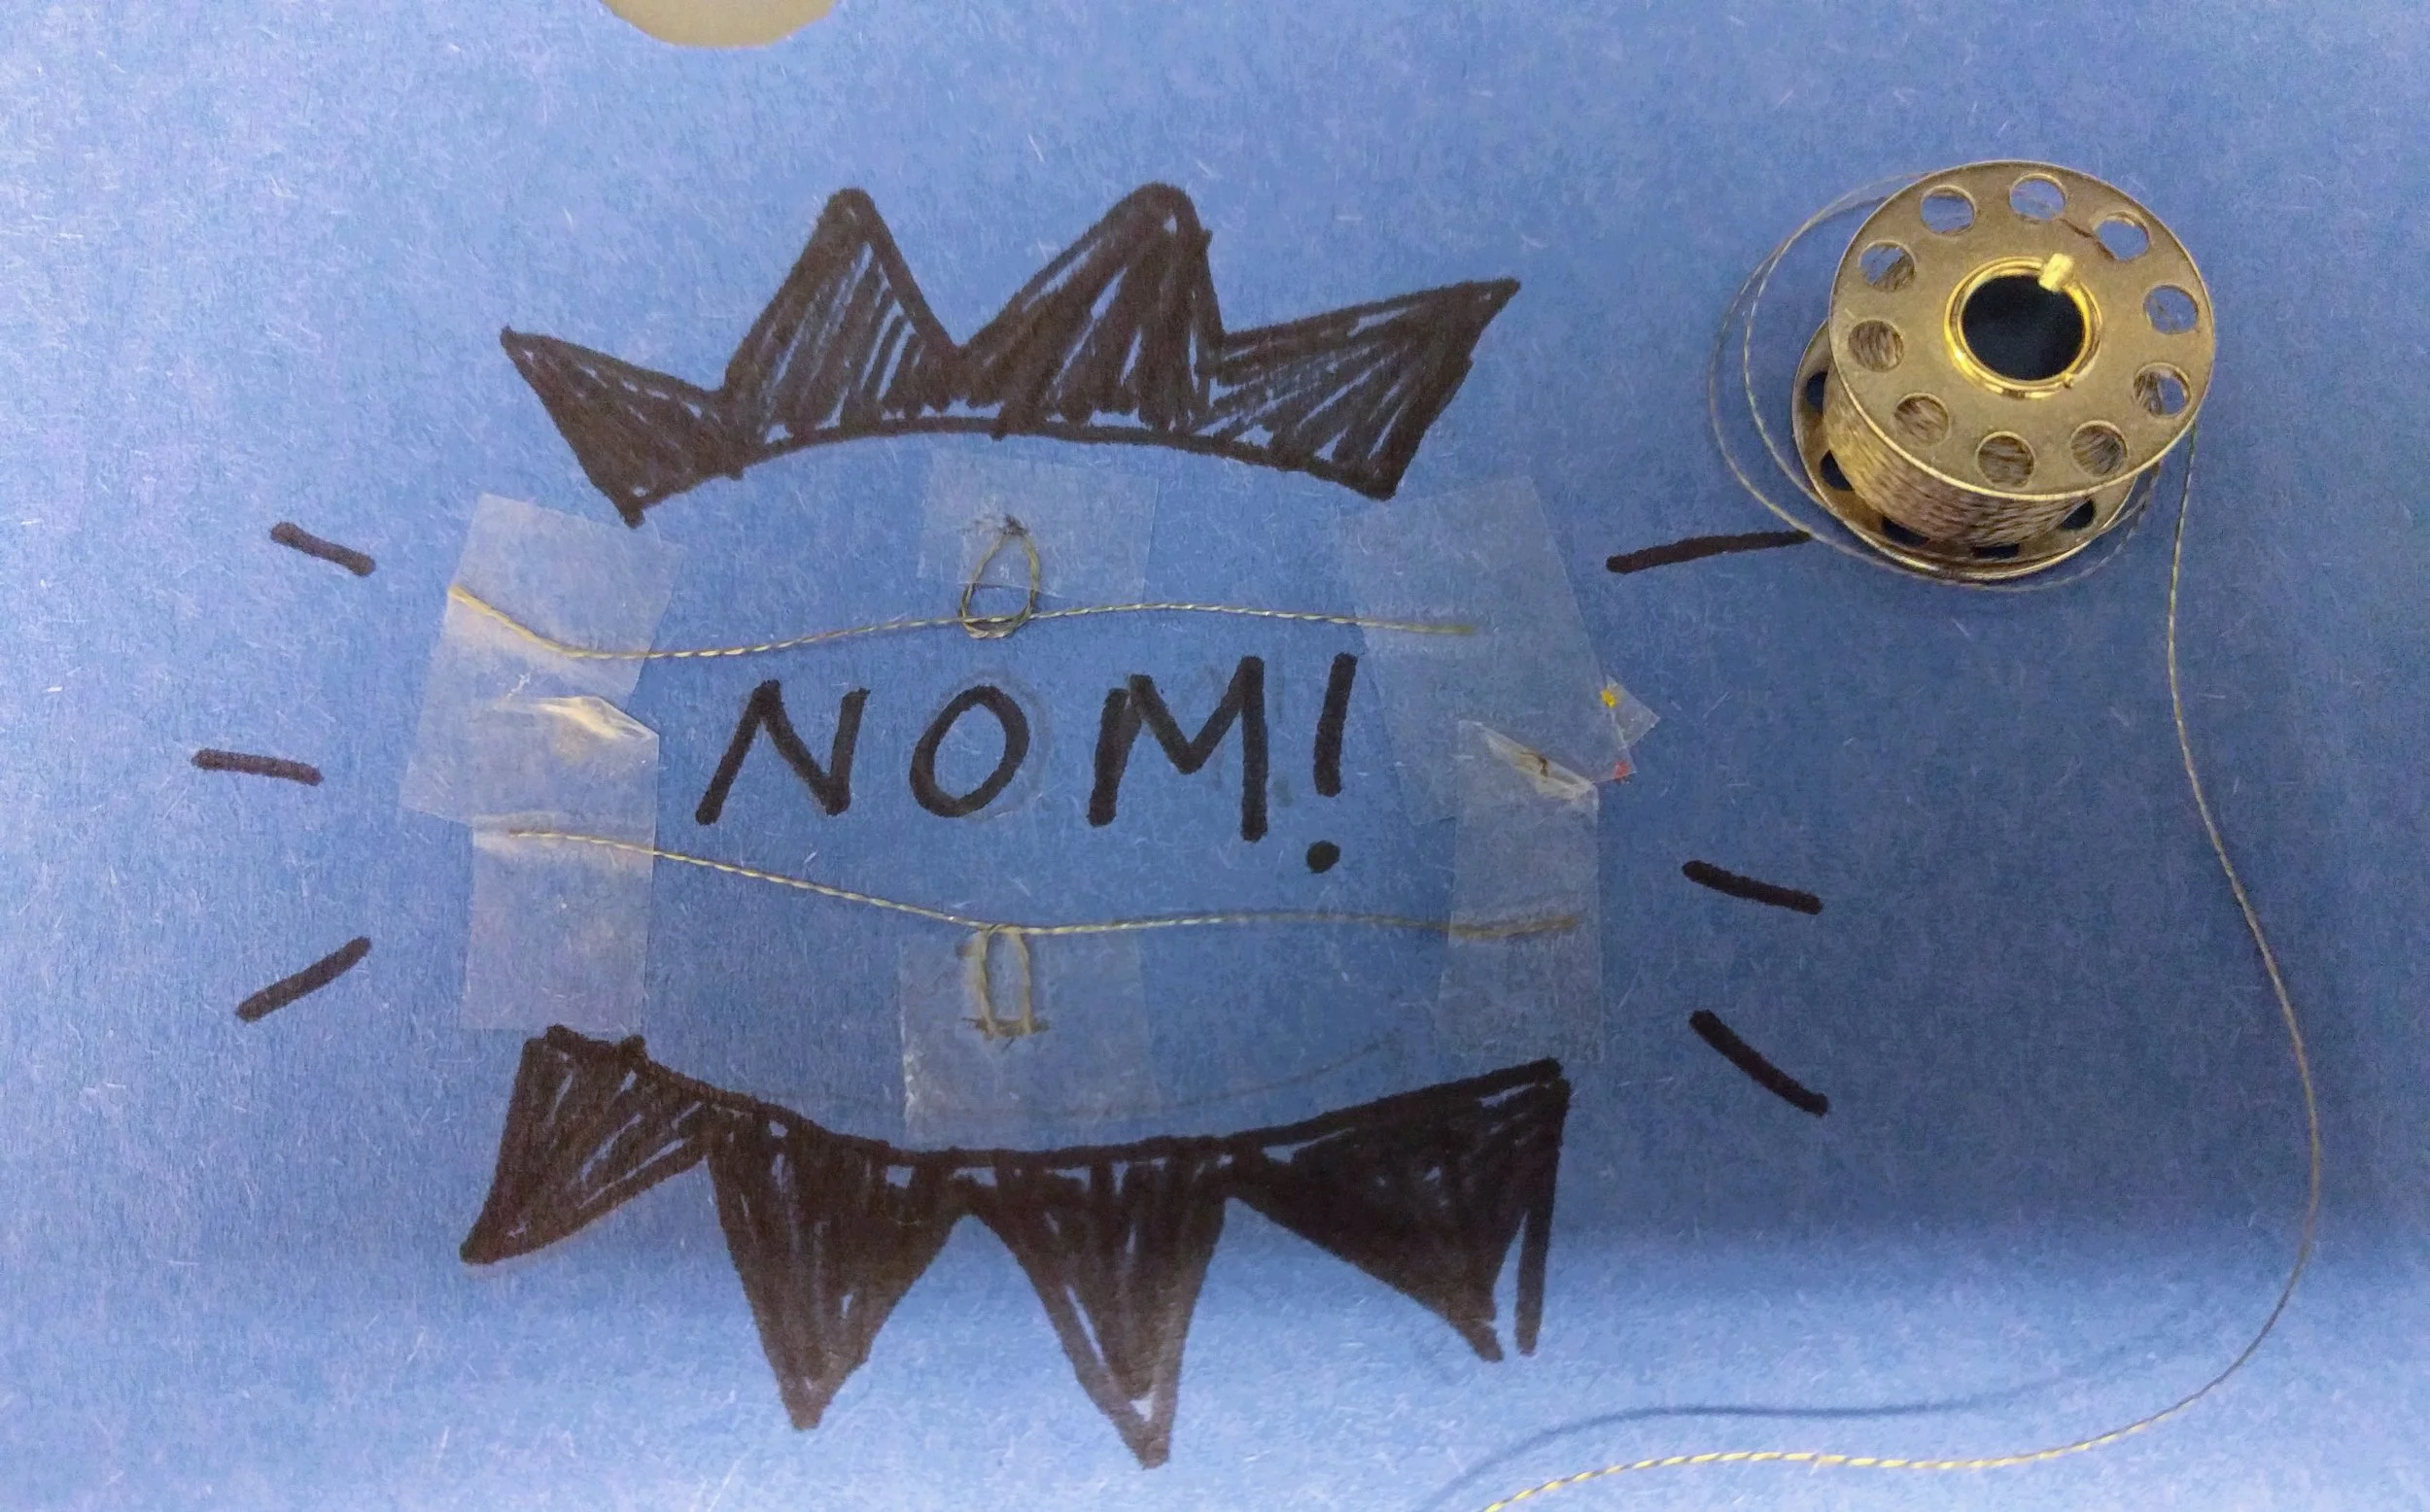
Above and below the word NOM! is a piece of conductive thread. Together, this makes up a voltage divider which can read the resistance of each fish.
The Technical Side
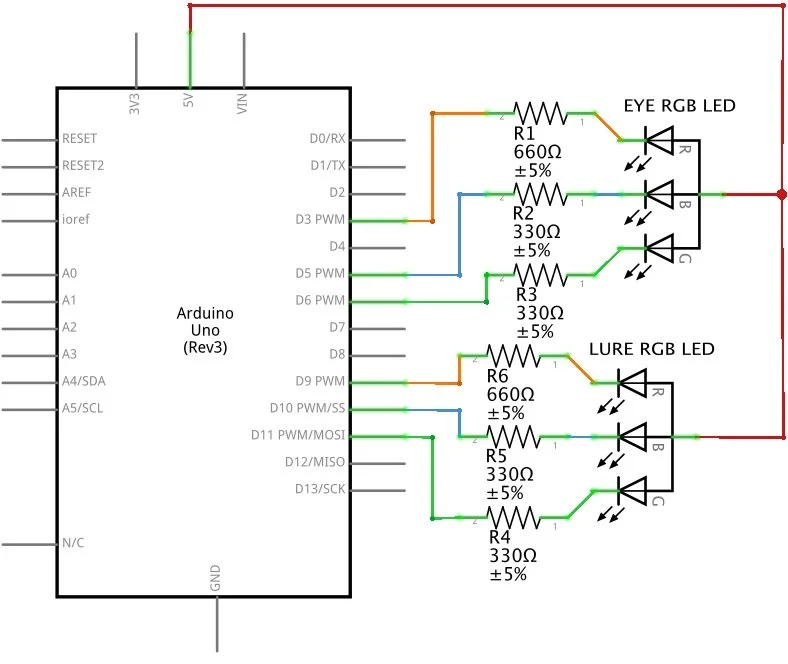
I wrote the code and developed the circuit myself. I used Arduino because it’s an accessible platform for kids to get started on circuits and code.
Recognition
The Hangry Angler was the Runner Up in the Sensors contest on Instructables.
The schematic of the Hangry Angler’s circuits controlling when the eye and the lure light up.

Bendables: A New Kind of Lego
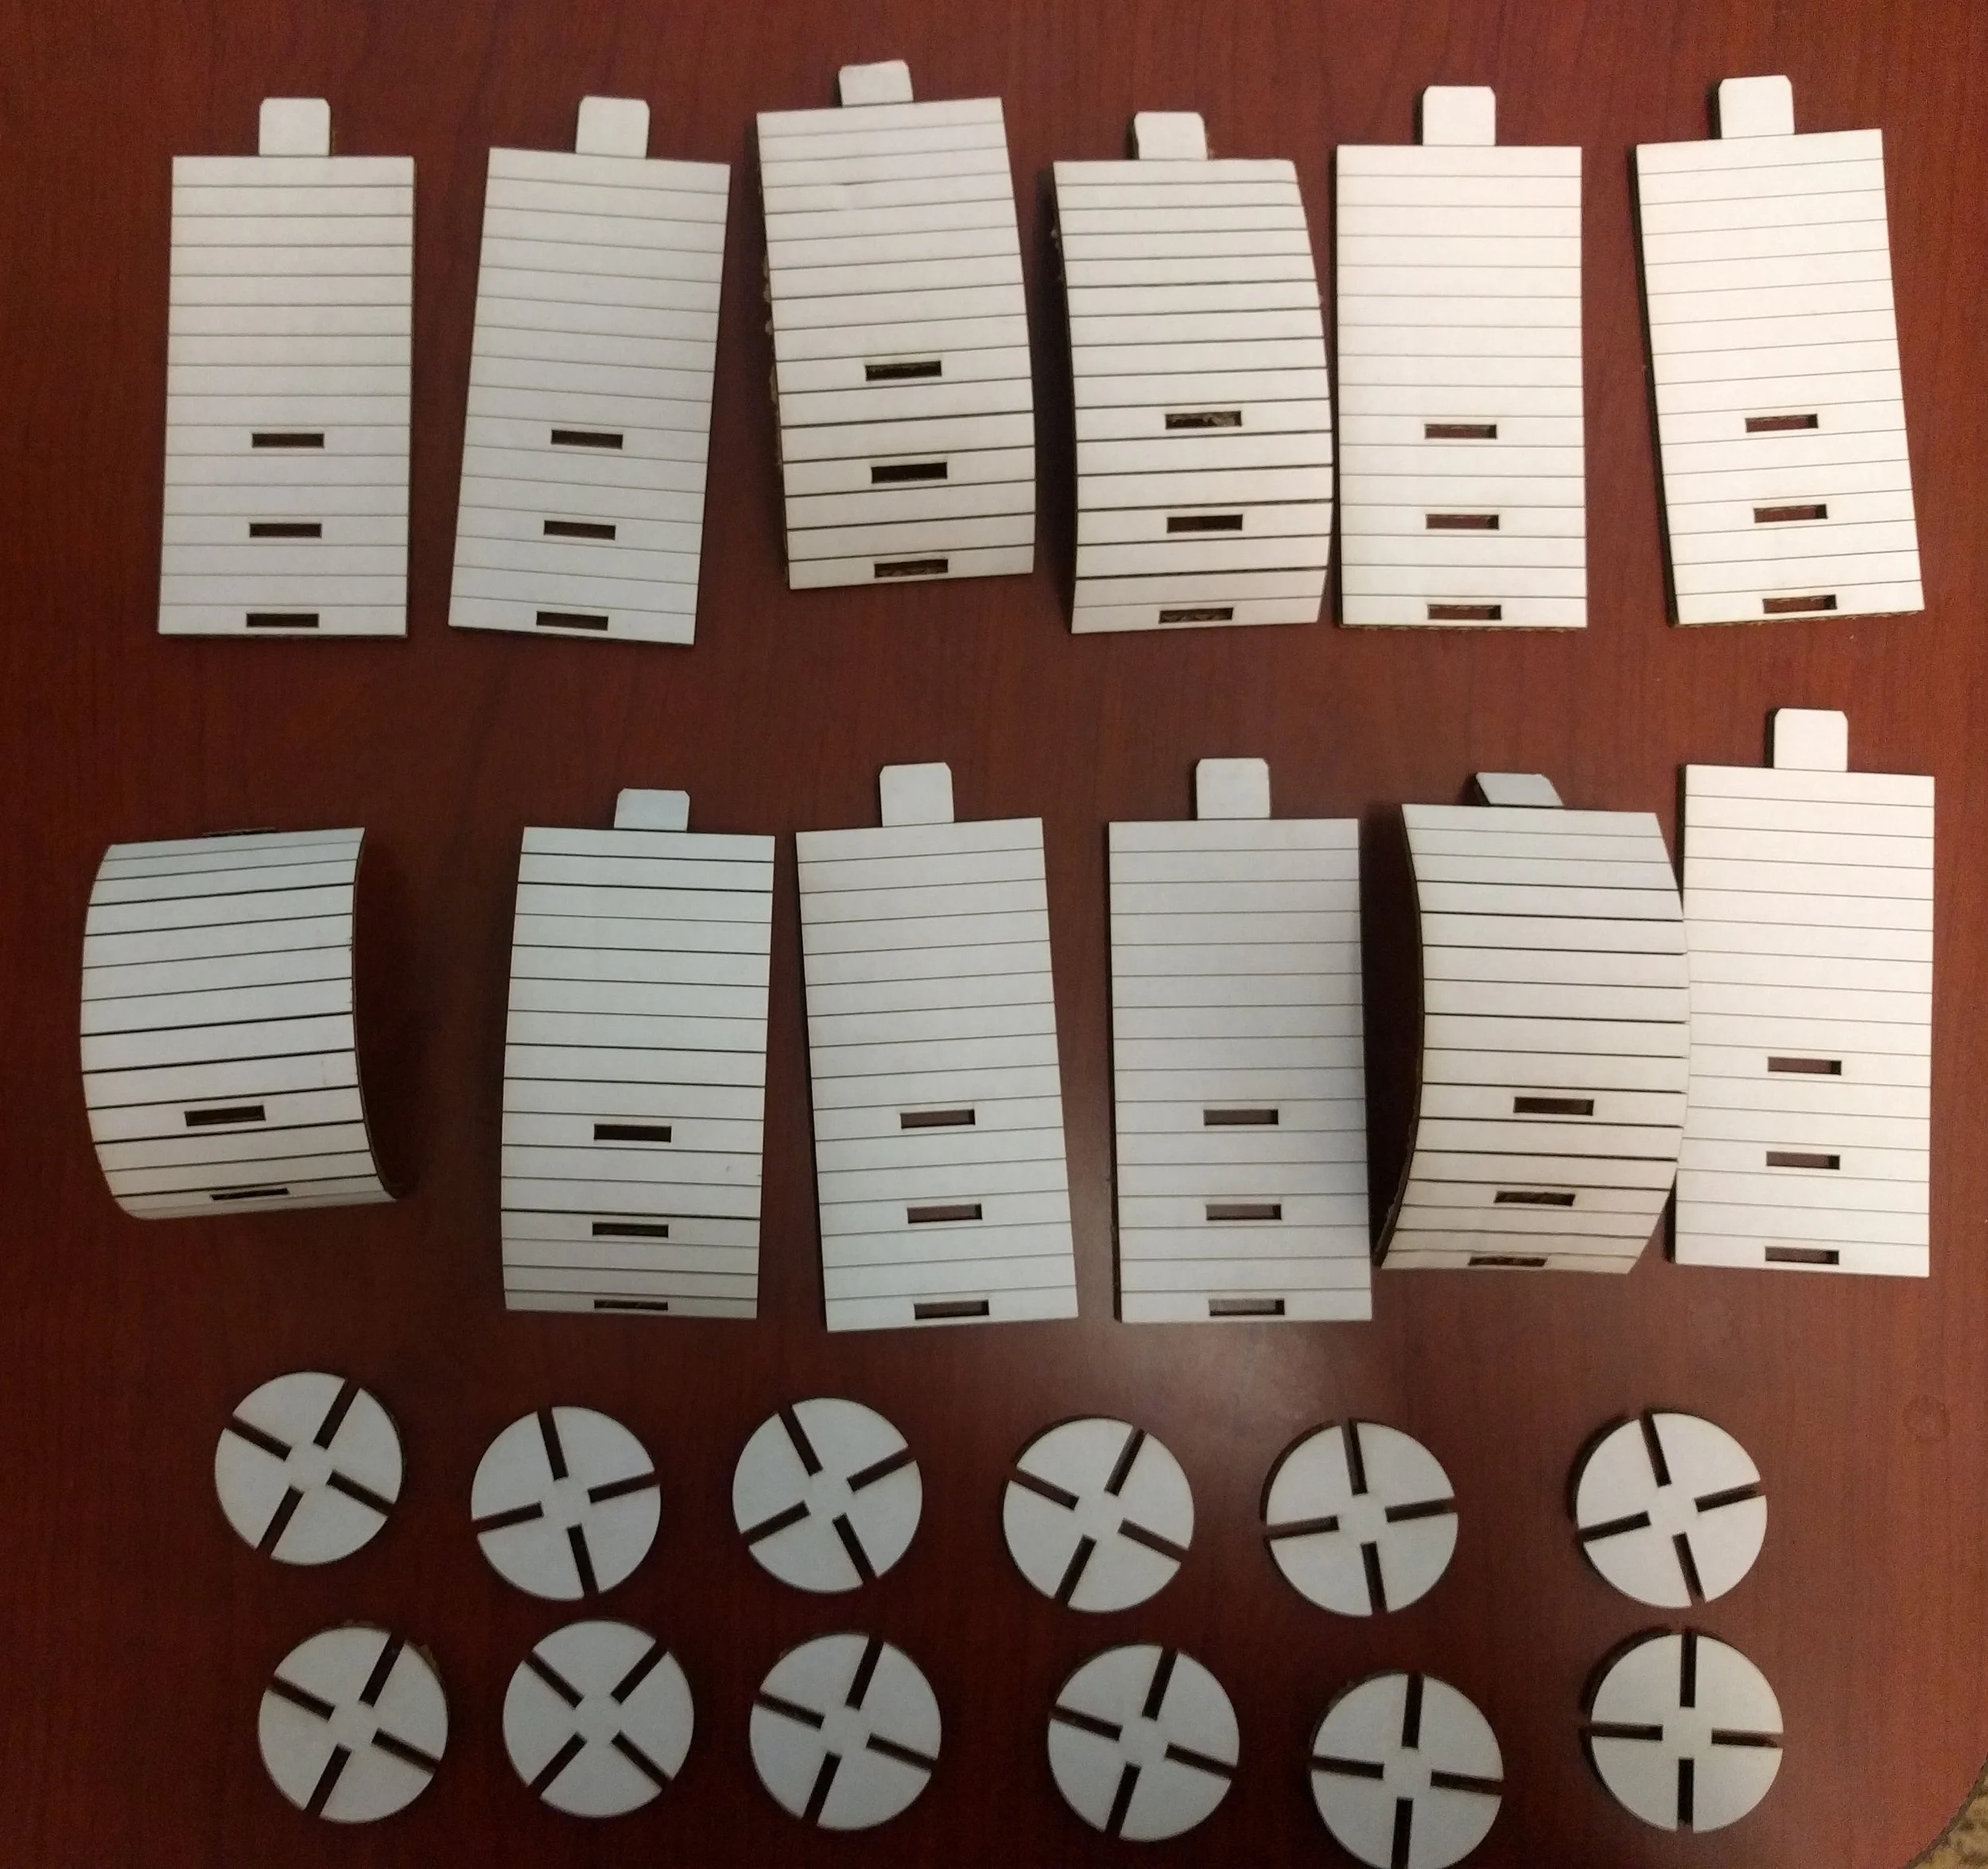
Bendables are a construction kit, like Legos, that consist of two different parts: the circular Connector and the scored, rectangular Bendable. The Bendable can be bent and circled back on itself to create all kinds of interesting shapes, while the Connectors are free to go on any flat edge of the Bendable, allowing for limitless construction possibilities.
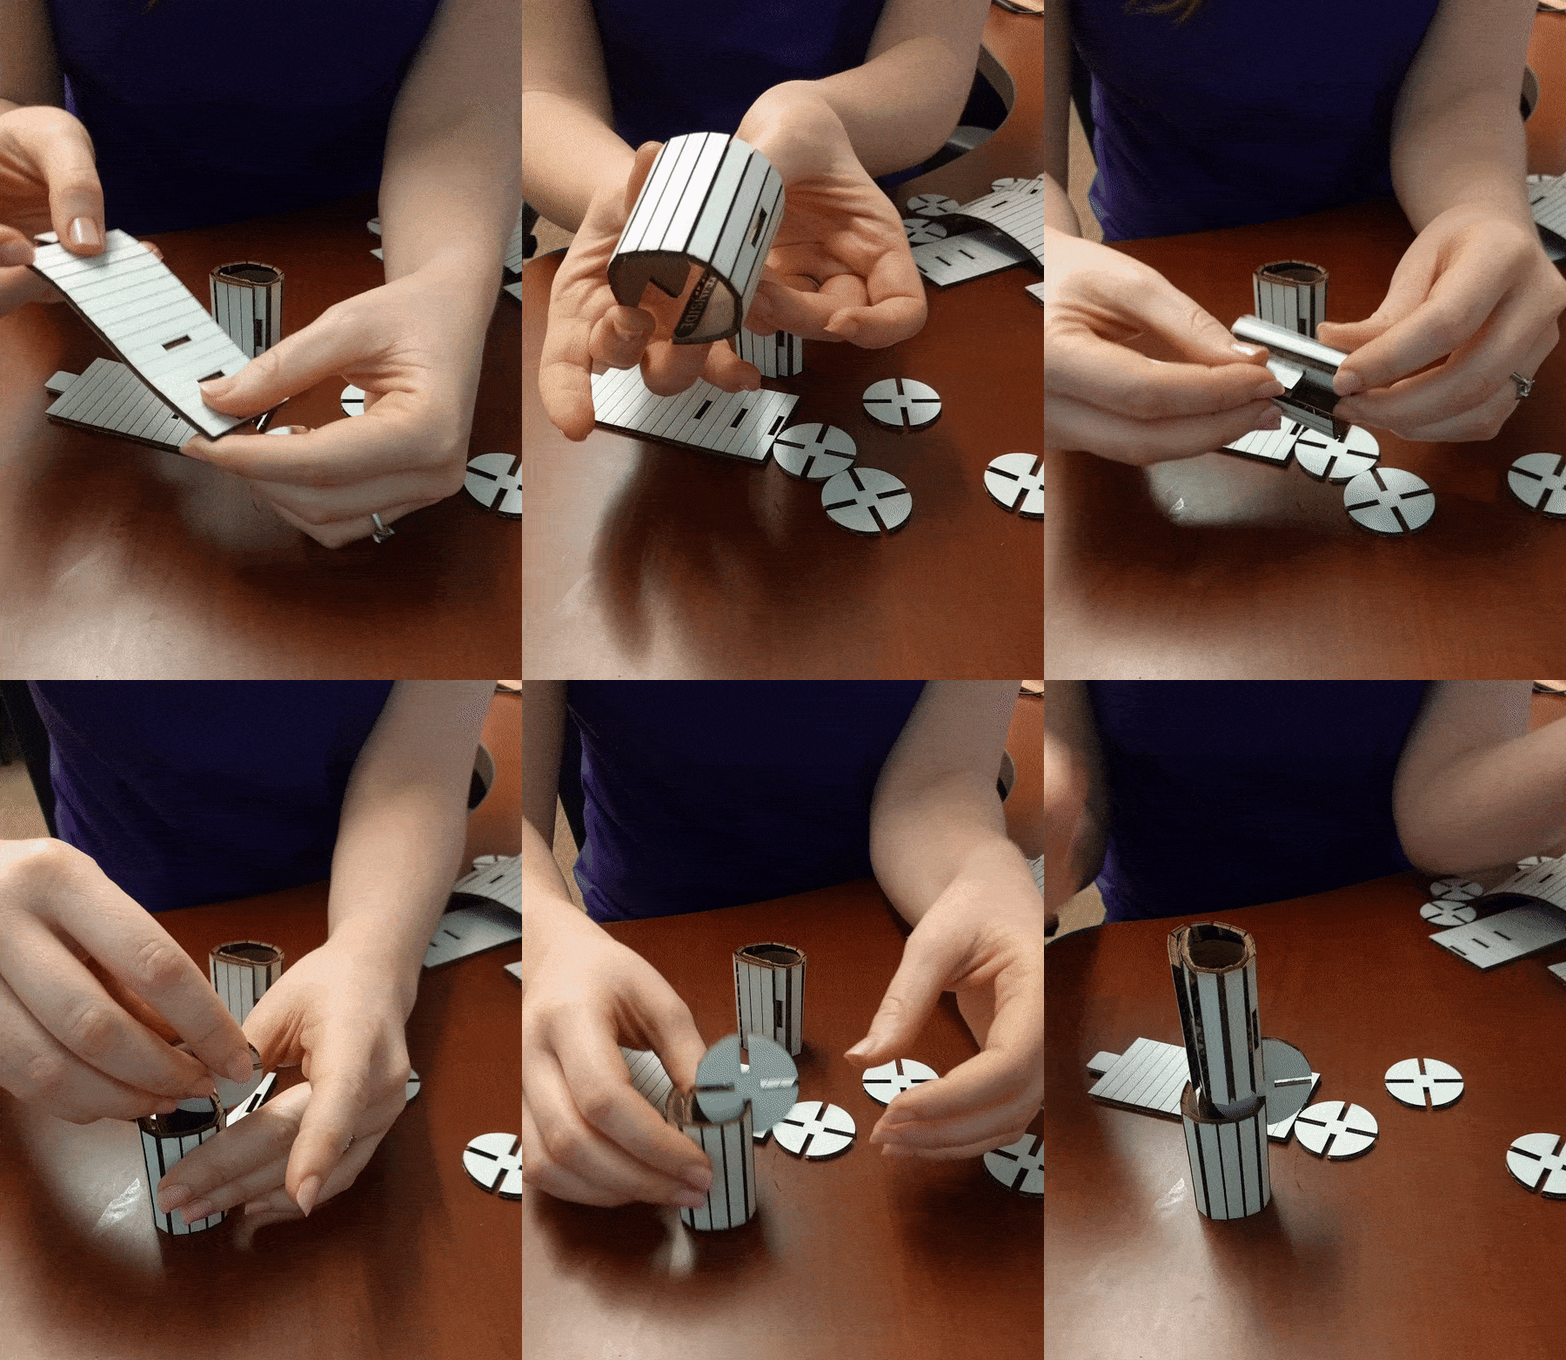
Me playing with the Bendables construction kit and showing their flexibility and wide capabilities.
Ideation
Rather than jumping straight to laser cutting, I started with an even lower fidelity medium. I used cardboard and a utility knife to play with shapes and figure out what is even possible. That’s how I stumbled across the Bendables shape and chose it for it’s flexibility and novelty.
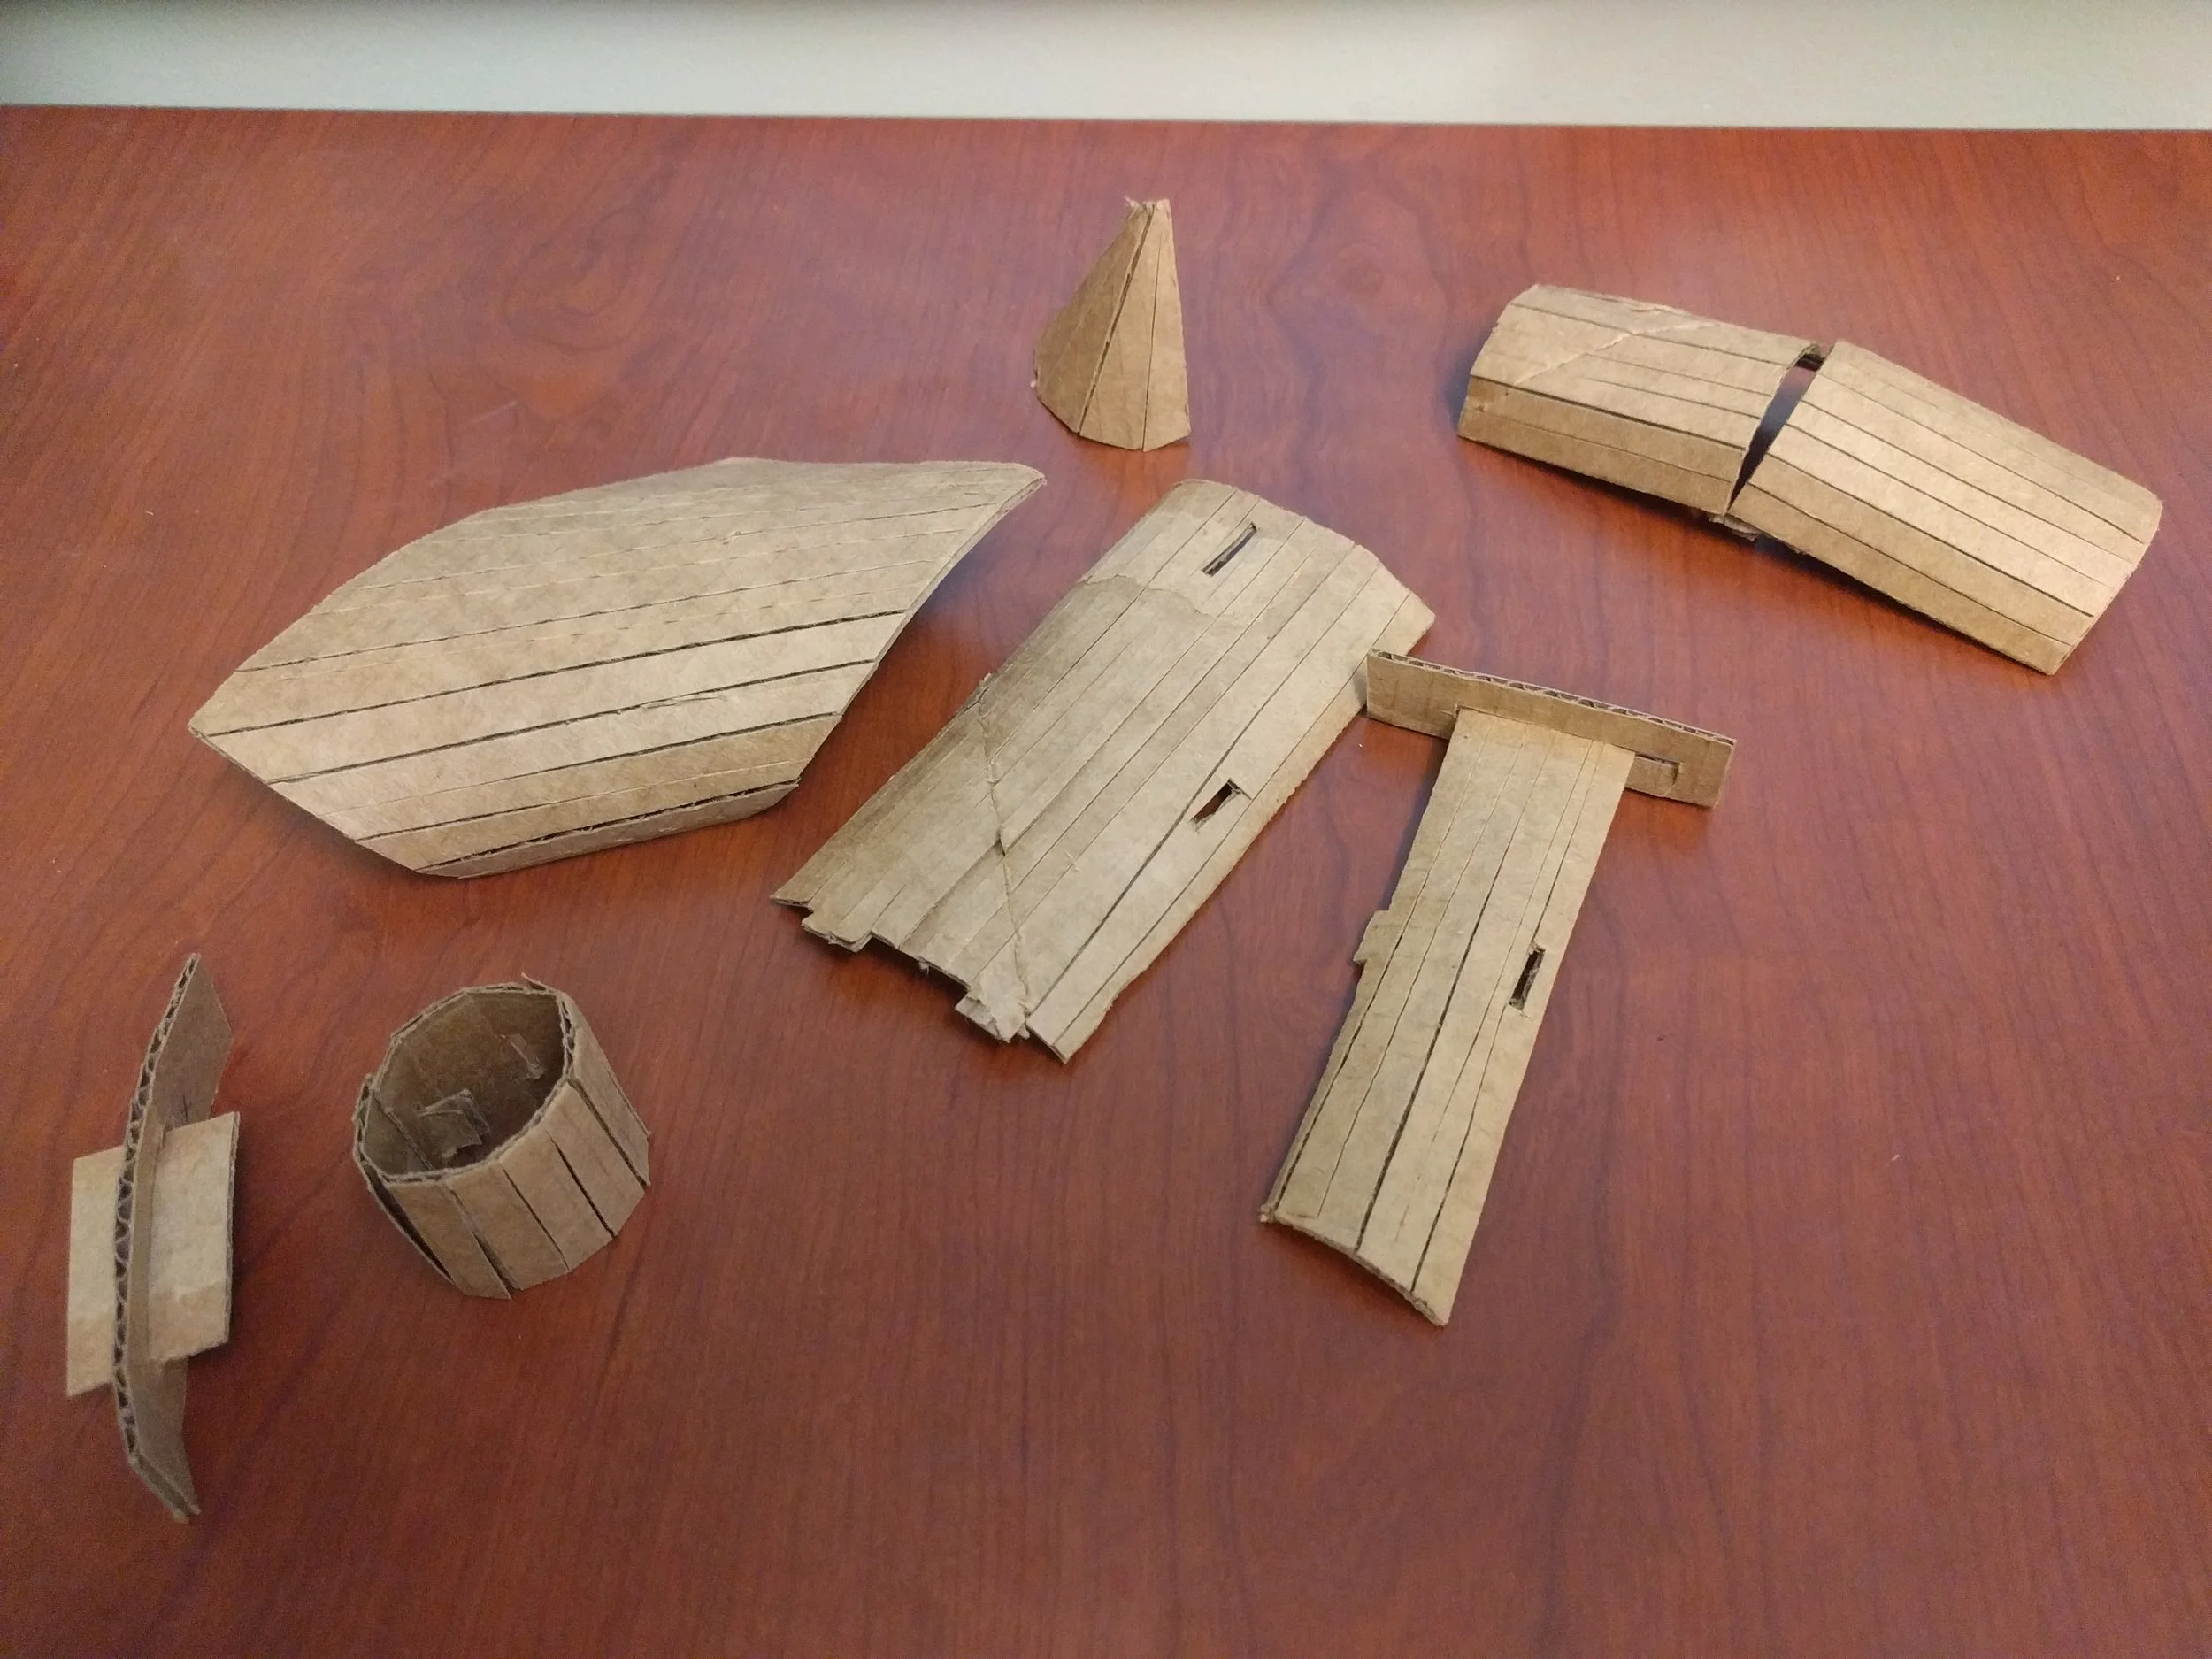
Prototypes of my construction kit made with a utility knife and cardboard.
Narrowing Down Size and Shape
Next I needed to determine the exact dimensions of the bendables so they would fit together properly. I made several test gauges on the laser cutter for the tab size and score line of the Bendables.
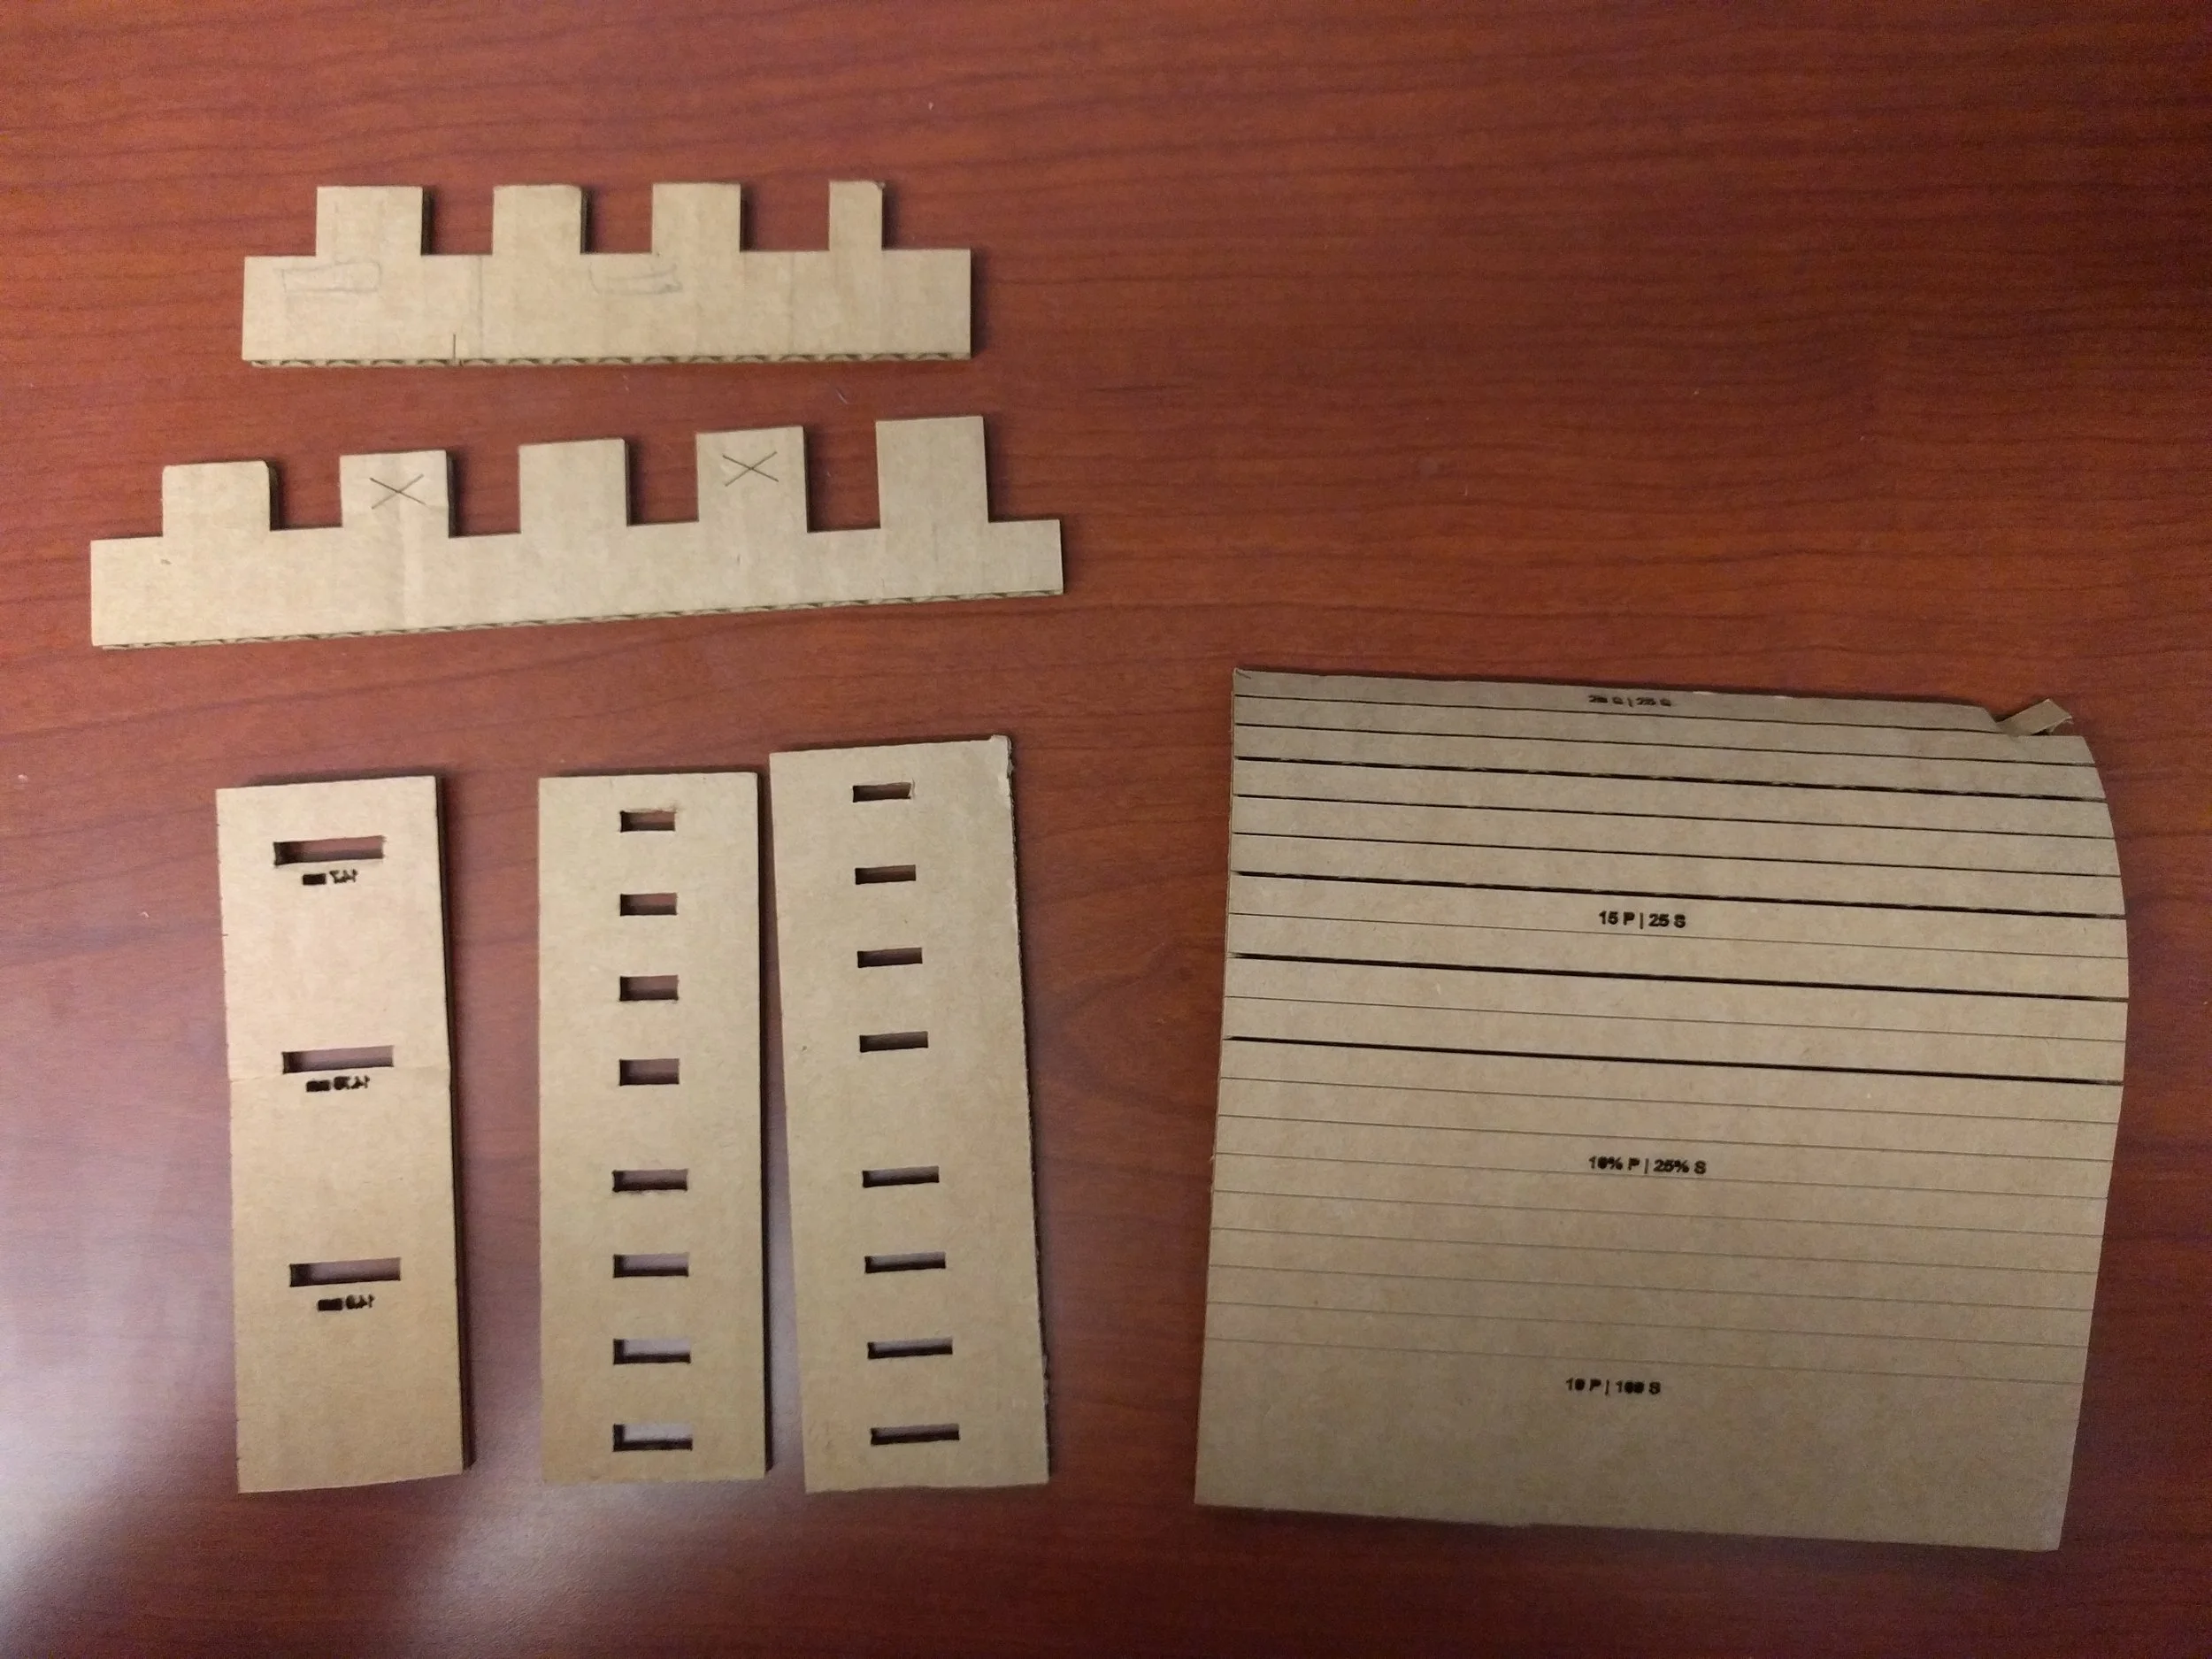
Test gauges like these helped me determine the proper fit of the pieces.
With the fit figured out, I created a file to cut out my chosen shapes at a couple different sizes.
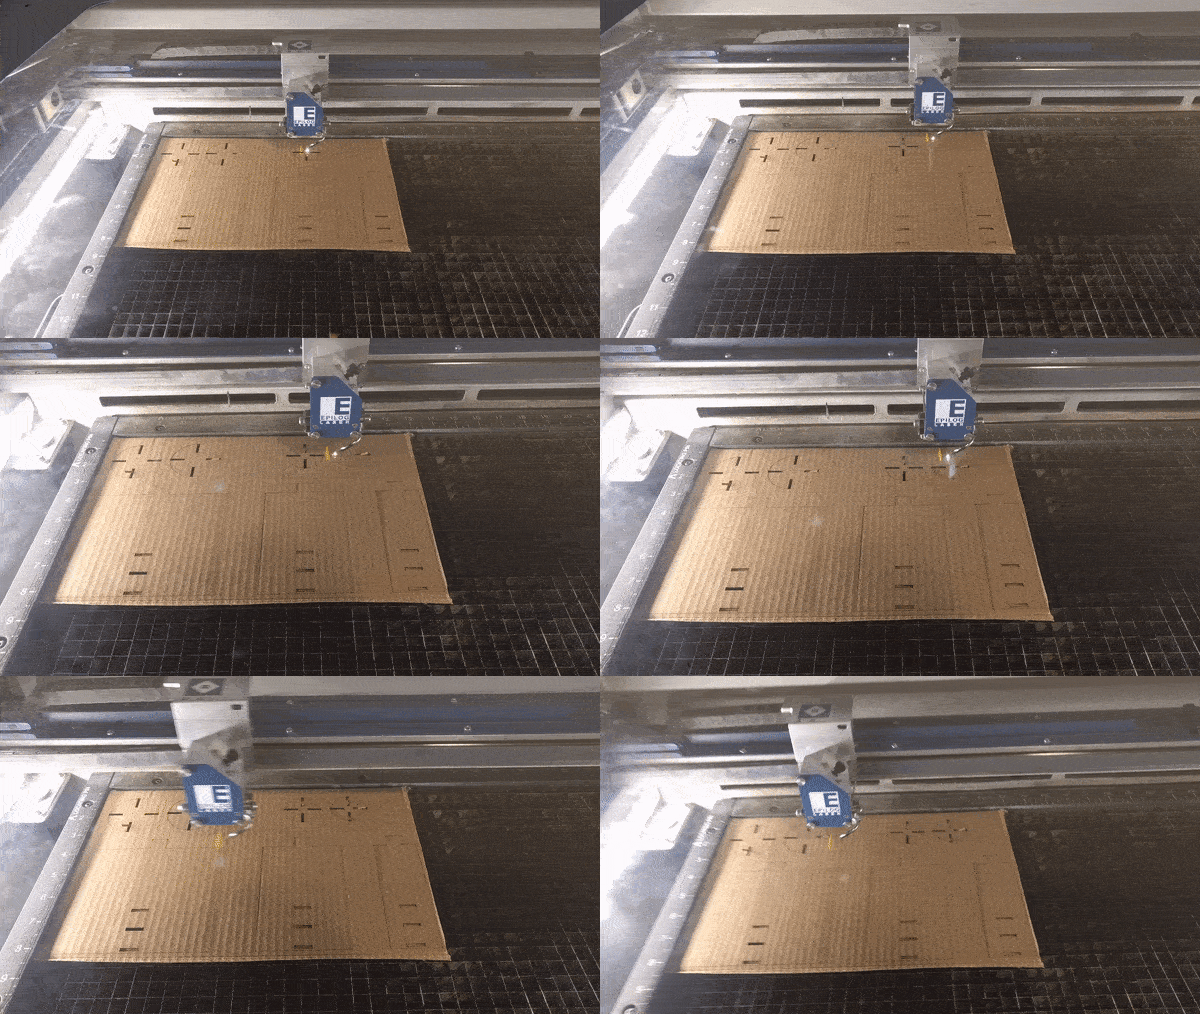
I cut many different sizes for my shapes before choosing the final parameters.
This allowed me to make sure that the shape would cut right before cutting several of them, and I could test the play with each of the sizes before choosing final parameters.
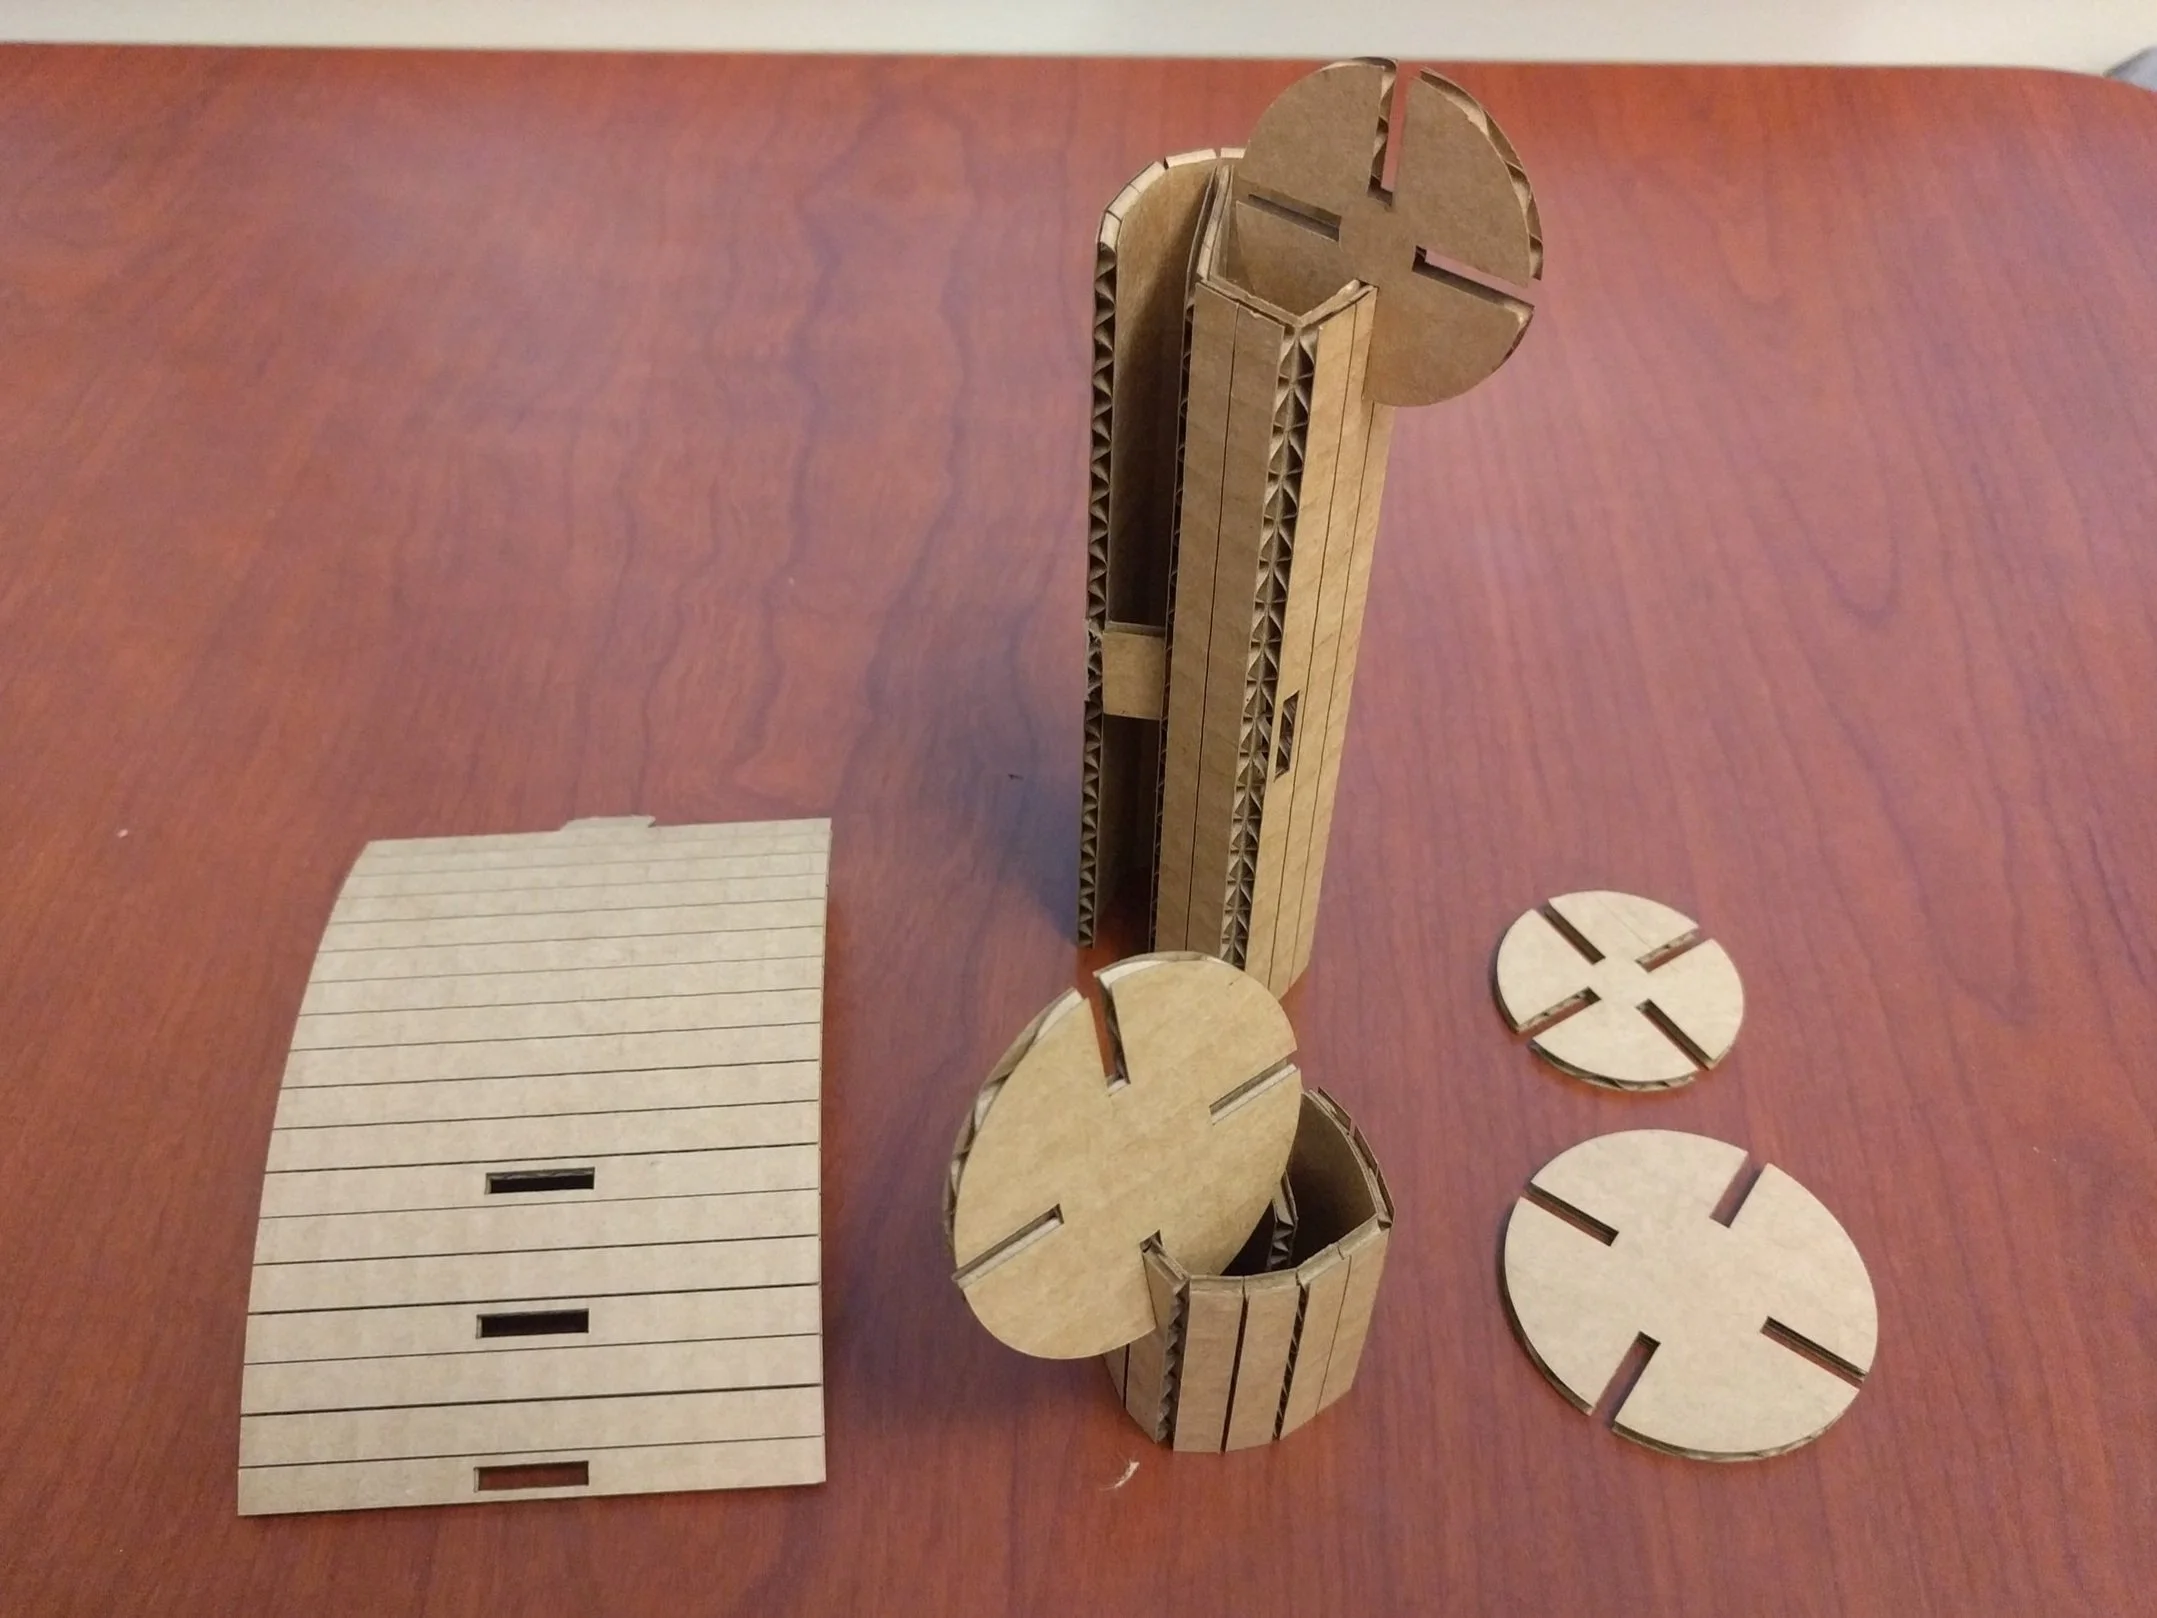
I tested several different sizes by playing with each.
Moving Parts
The sample set of Bendables that I made are a set of 12 of each part type. I found some cool capabilities that the flexible parts enable. For exmaple, one thing I found out about the rectangular pieces was that they allowed for several different sizes of cylinders. In the set I made, the smallest possible cylinder fits inside the largest.
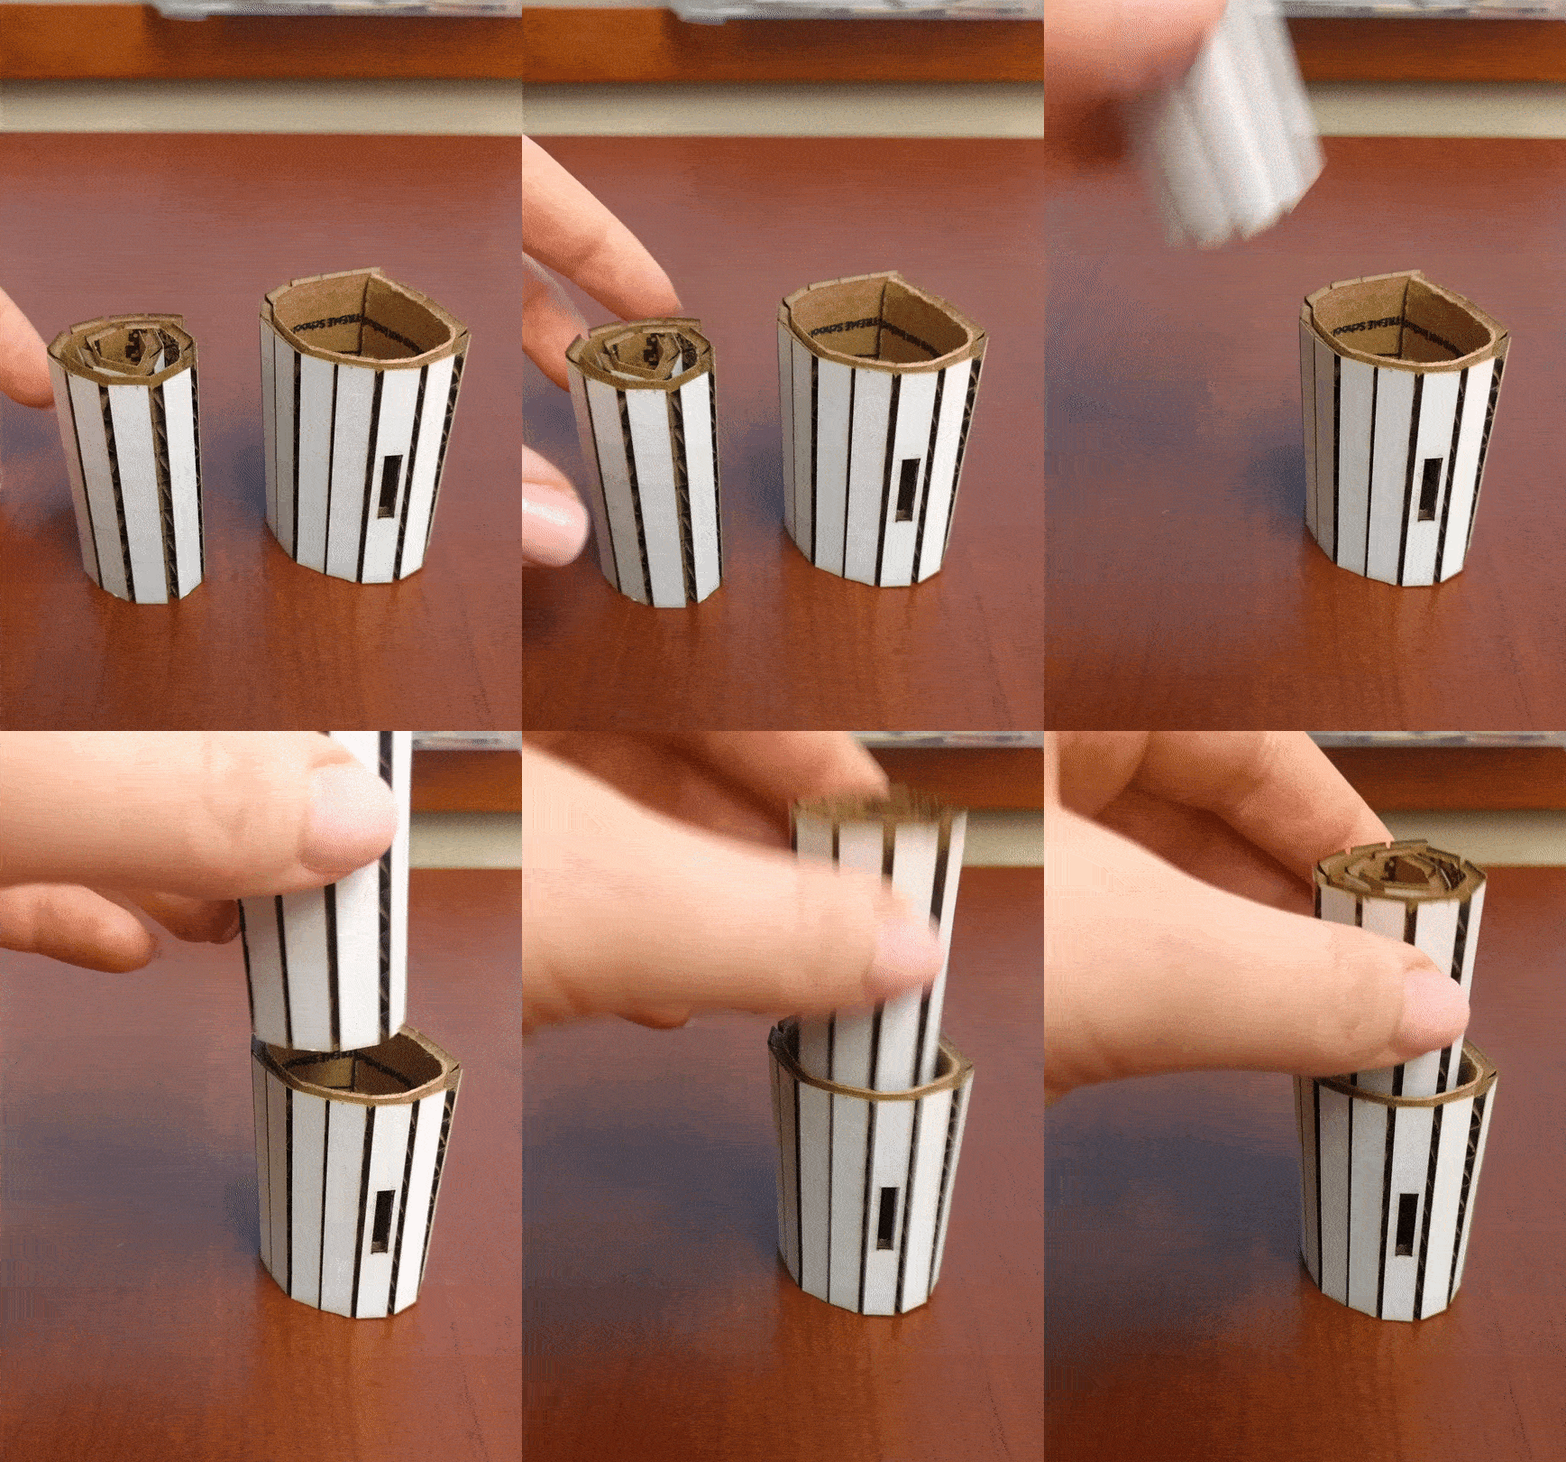
The Bendables can make cylinders that fit inside each other, allowing for moving parts.
This allows you to make moving parts! For example, if you were to make a castle, you could now add a working drawbridge to it.
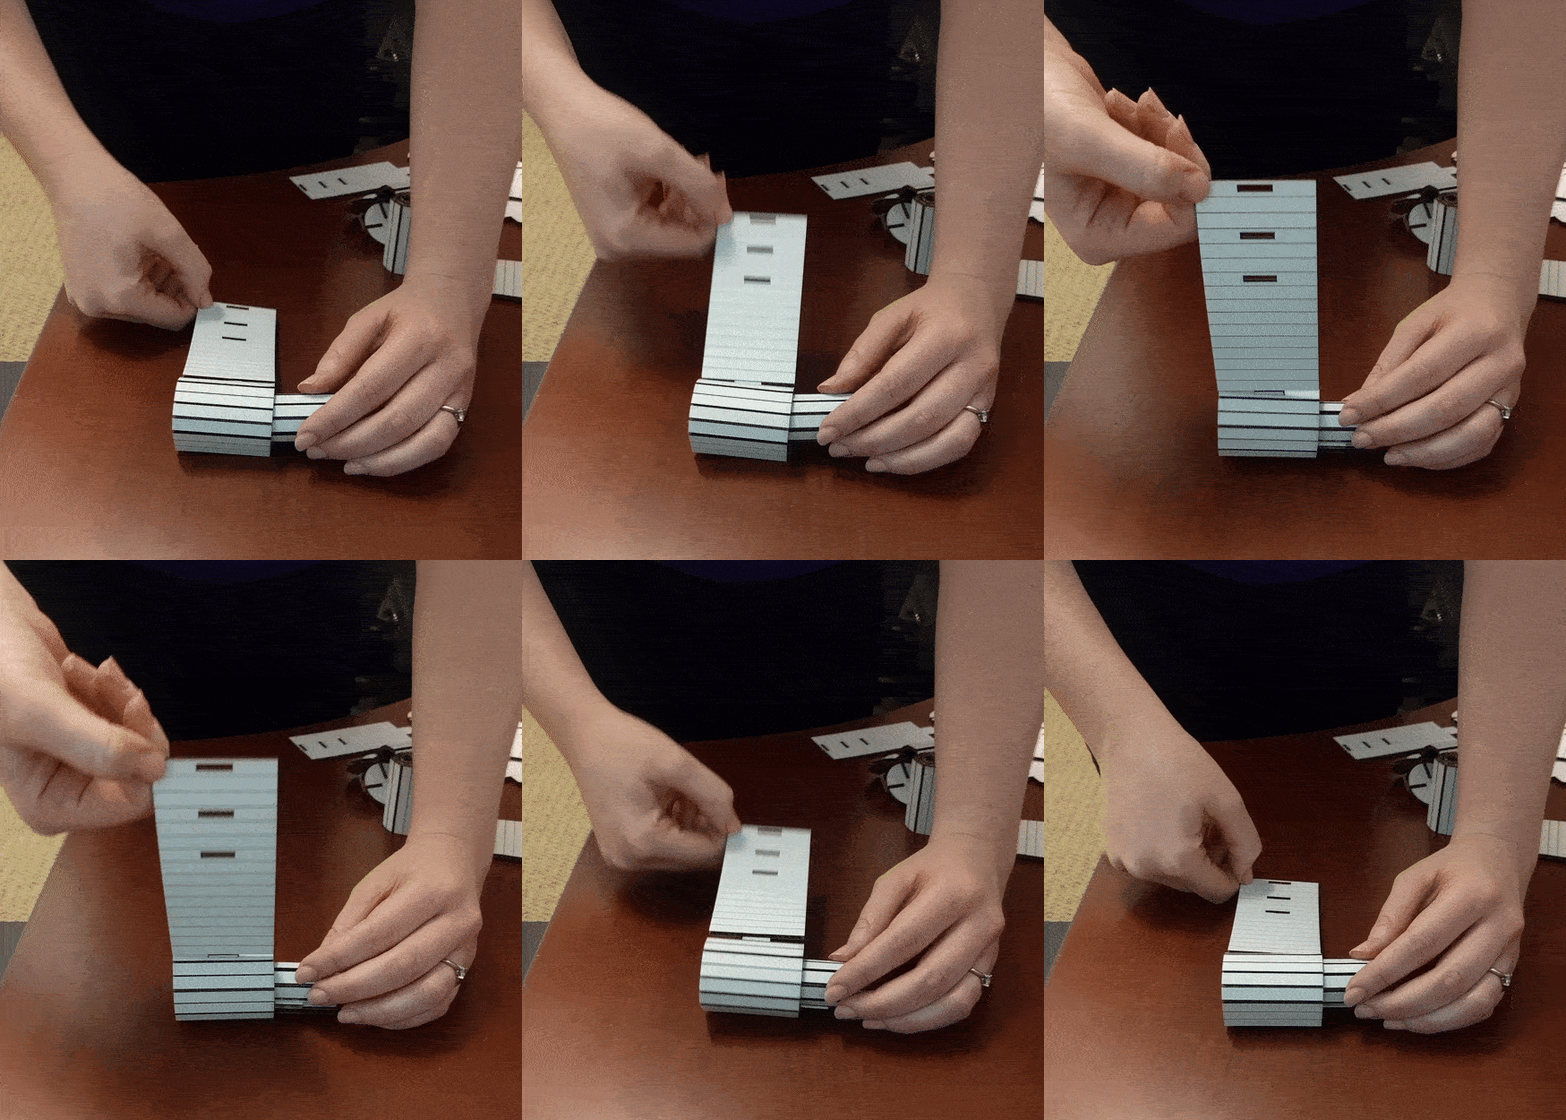
Bendables create opportunities to add moving parts to your construction. For example, you can add a working drawbridge to a castle.
Parameterization
The Rhino file I made the Bendables with is parameterized using Grasshopper. This means that even if you don’t have the exact same materials that I originally used, you can still print out a functional set. For example, if you have different width cardboard, you’ll need to update the size of the holes in the Bendables and Connectors. The parameterized file allows you to input your width and it outputs a newly sized printable file automatically. You can use whatever materials you have on hand, making it even more accessible to recreate and play with Bendables!

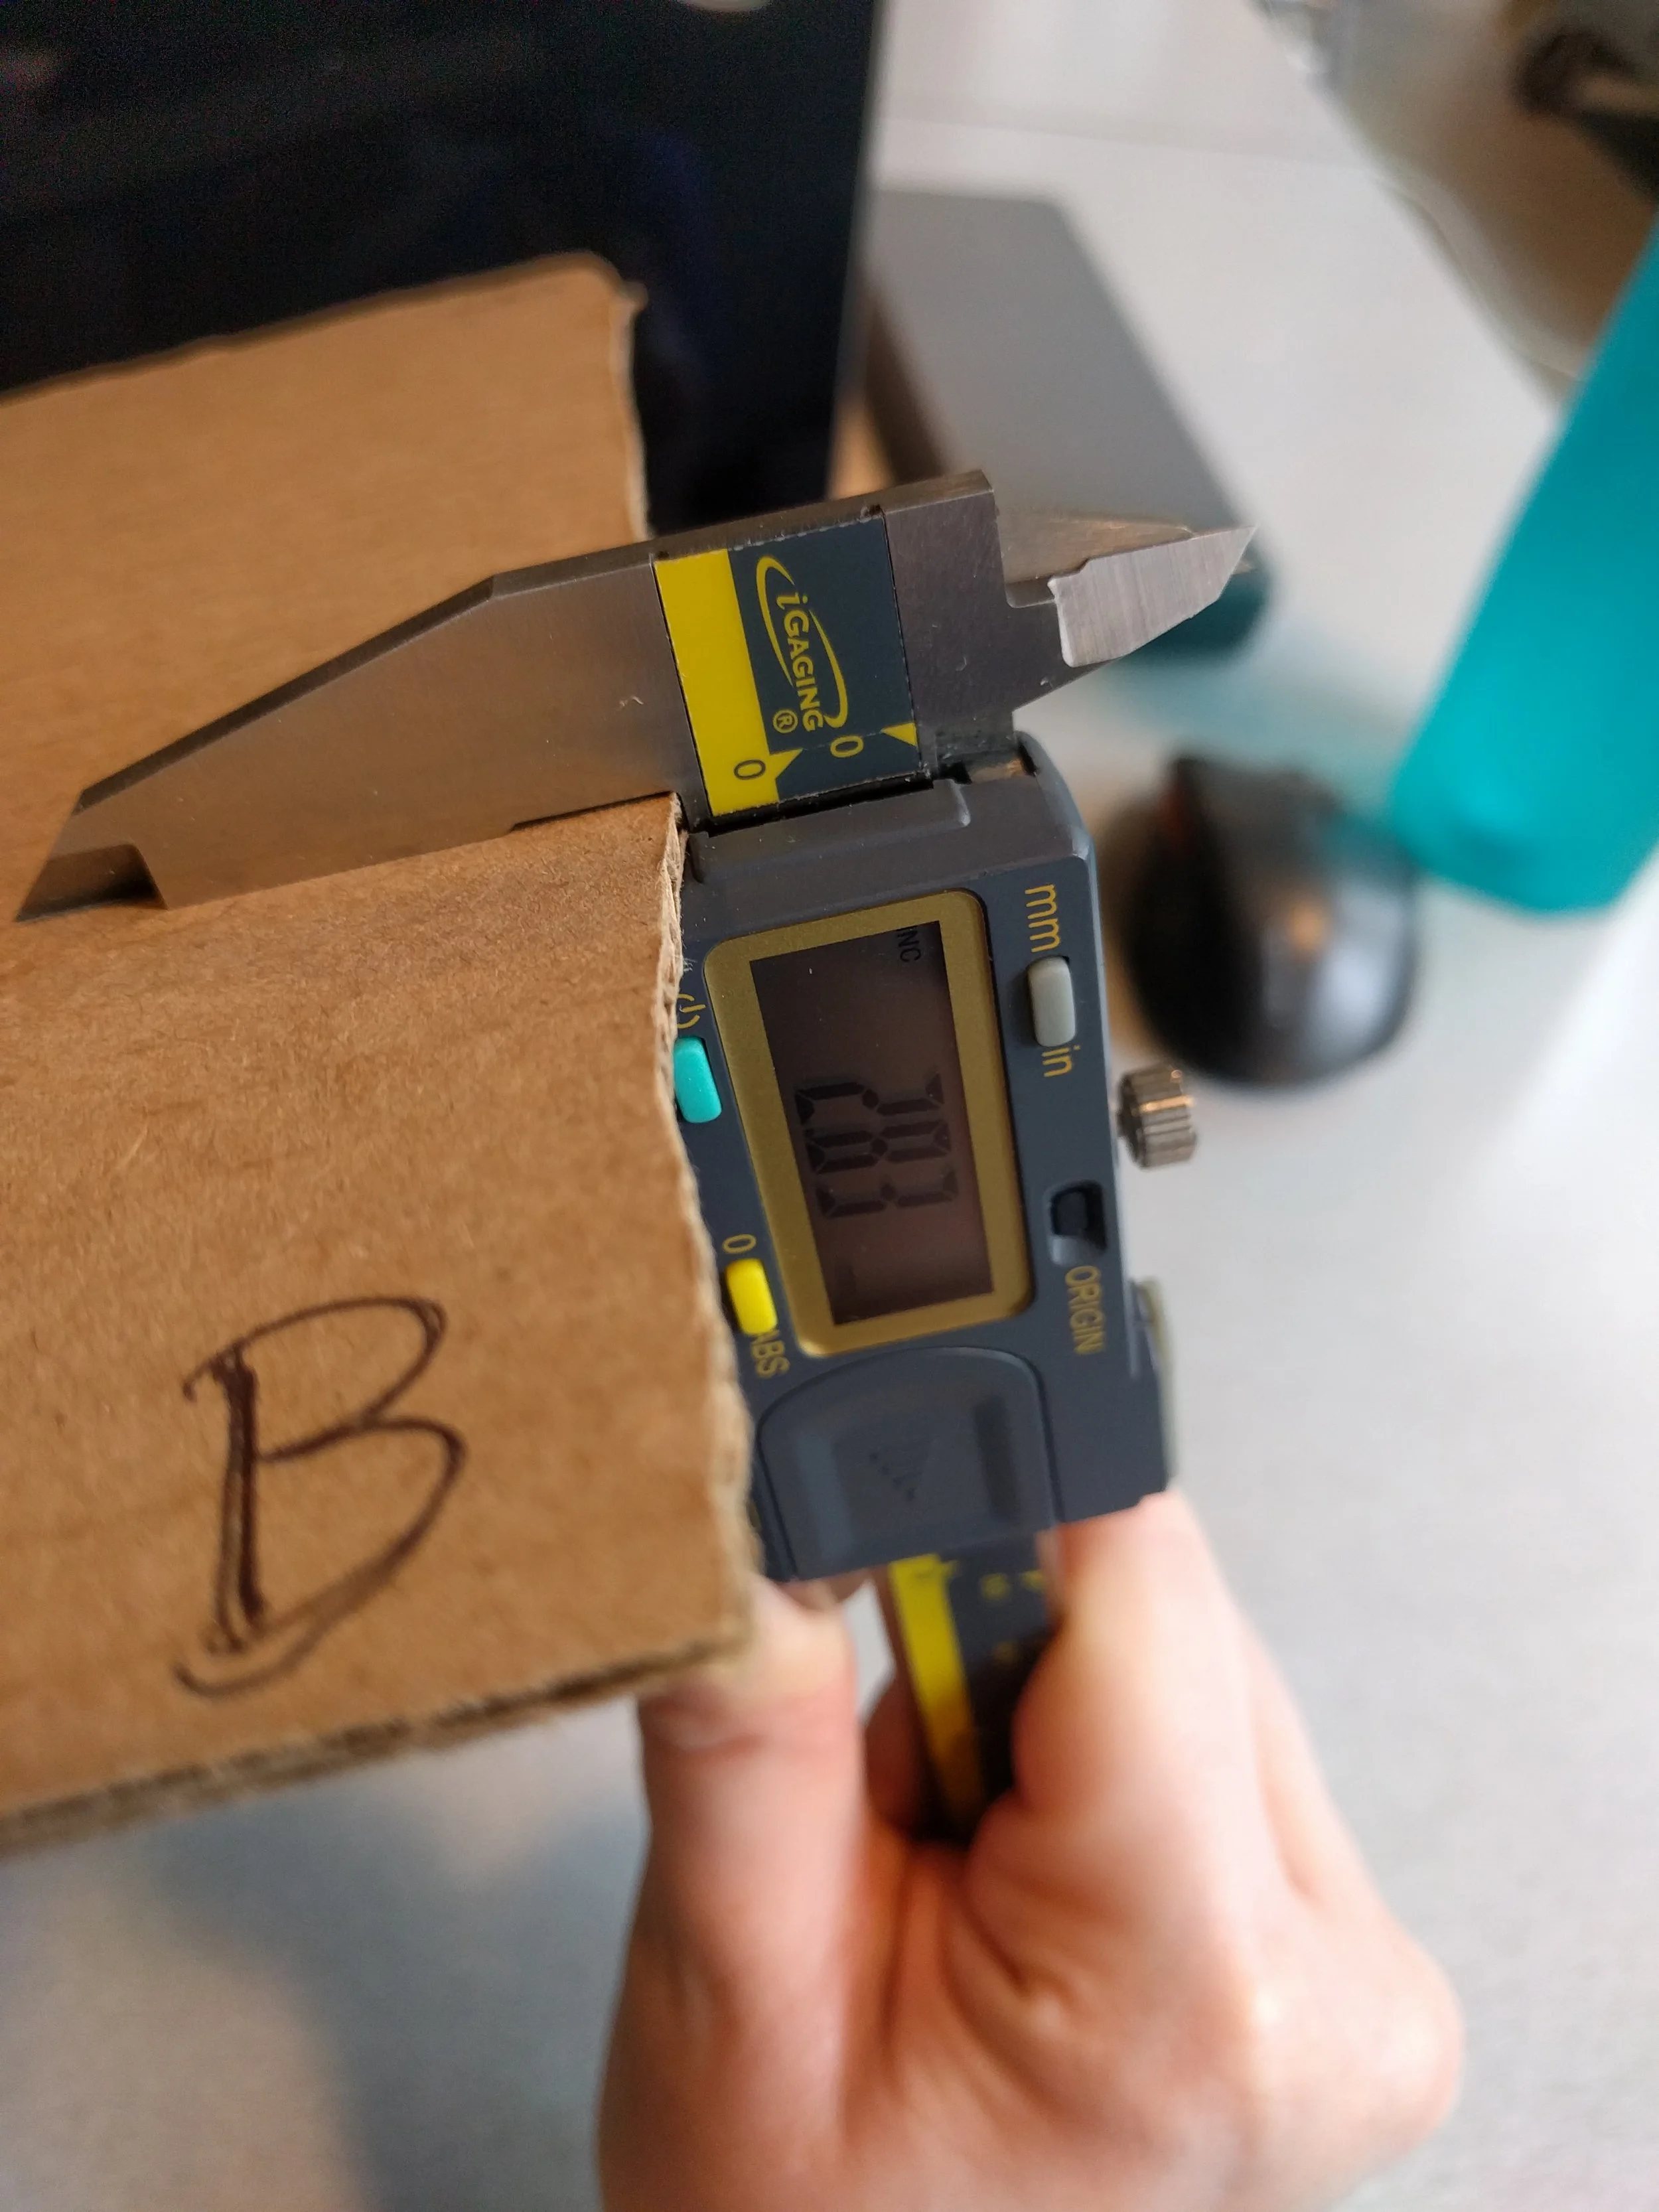
If you have different width cardboard like A and B above, you’ll need to update different dimensions of the kit.
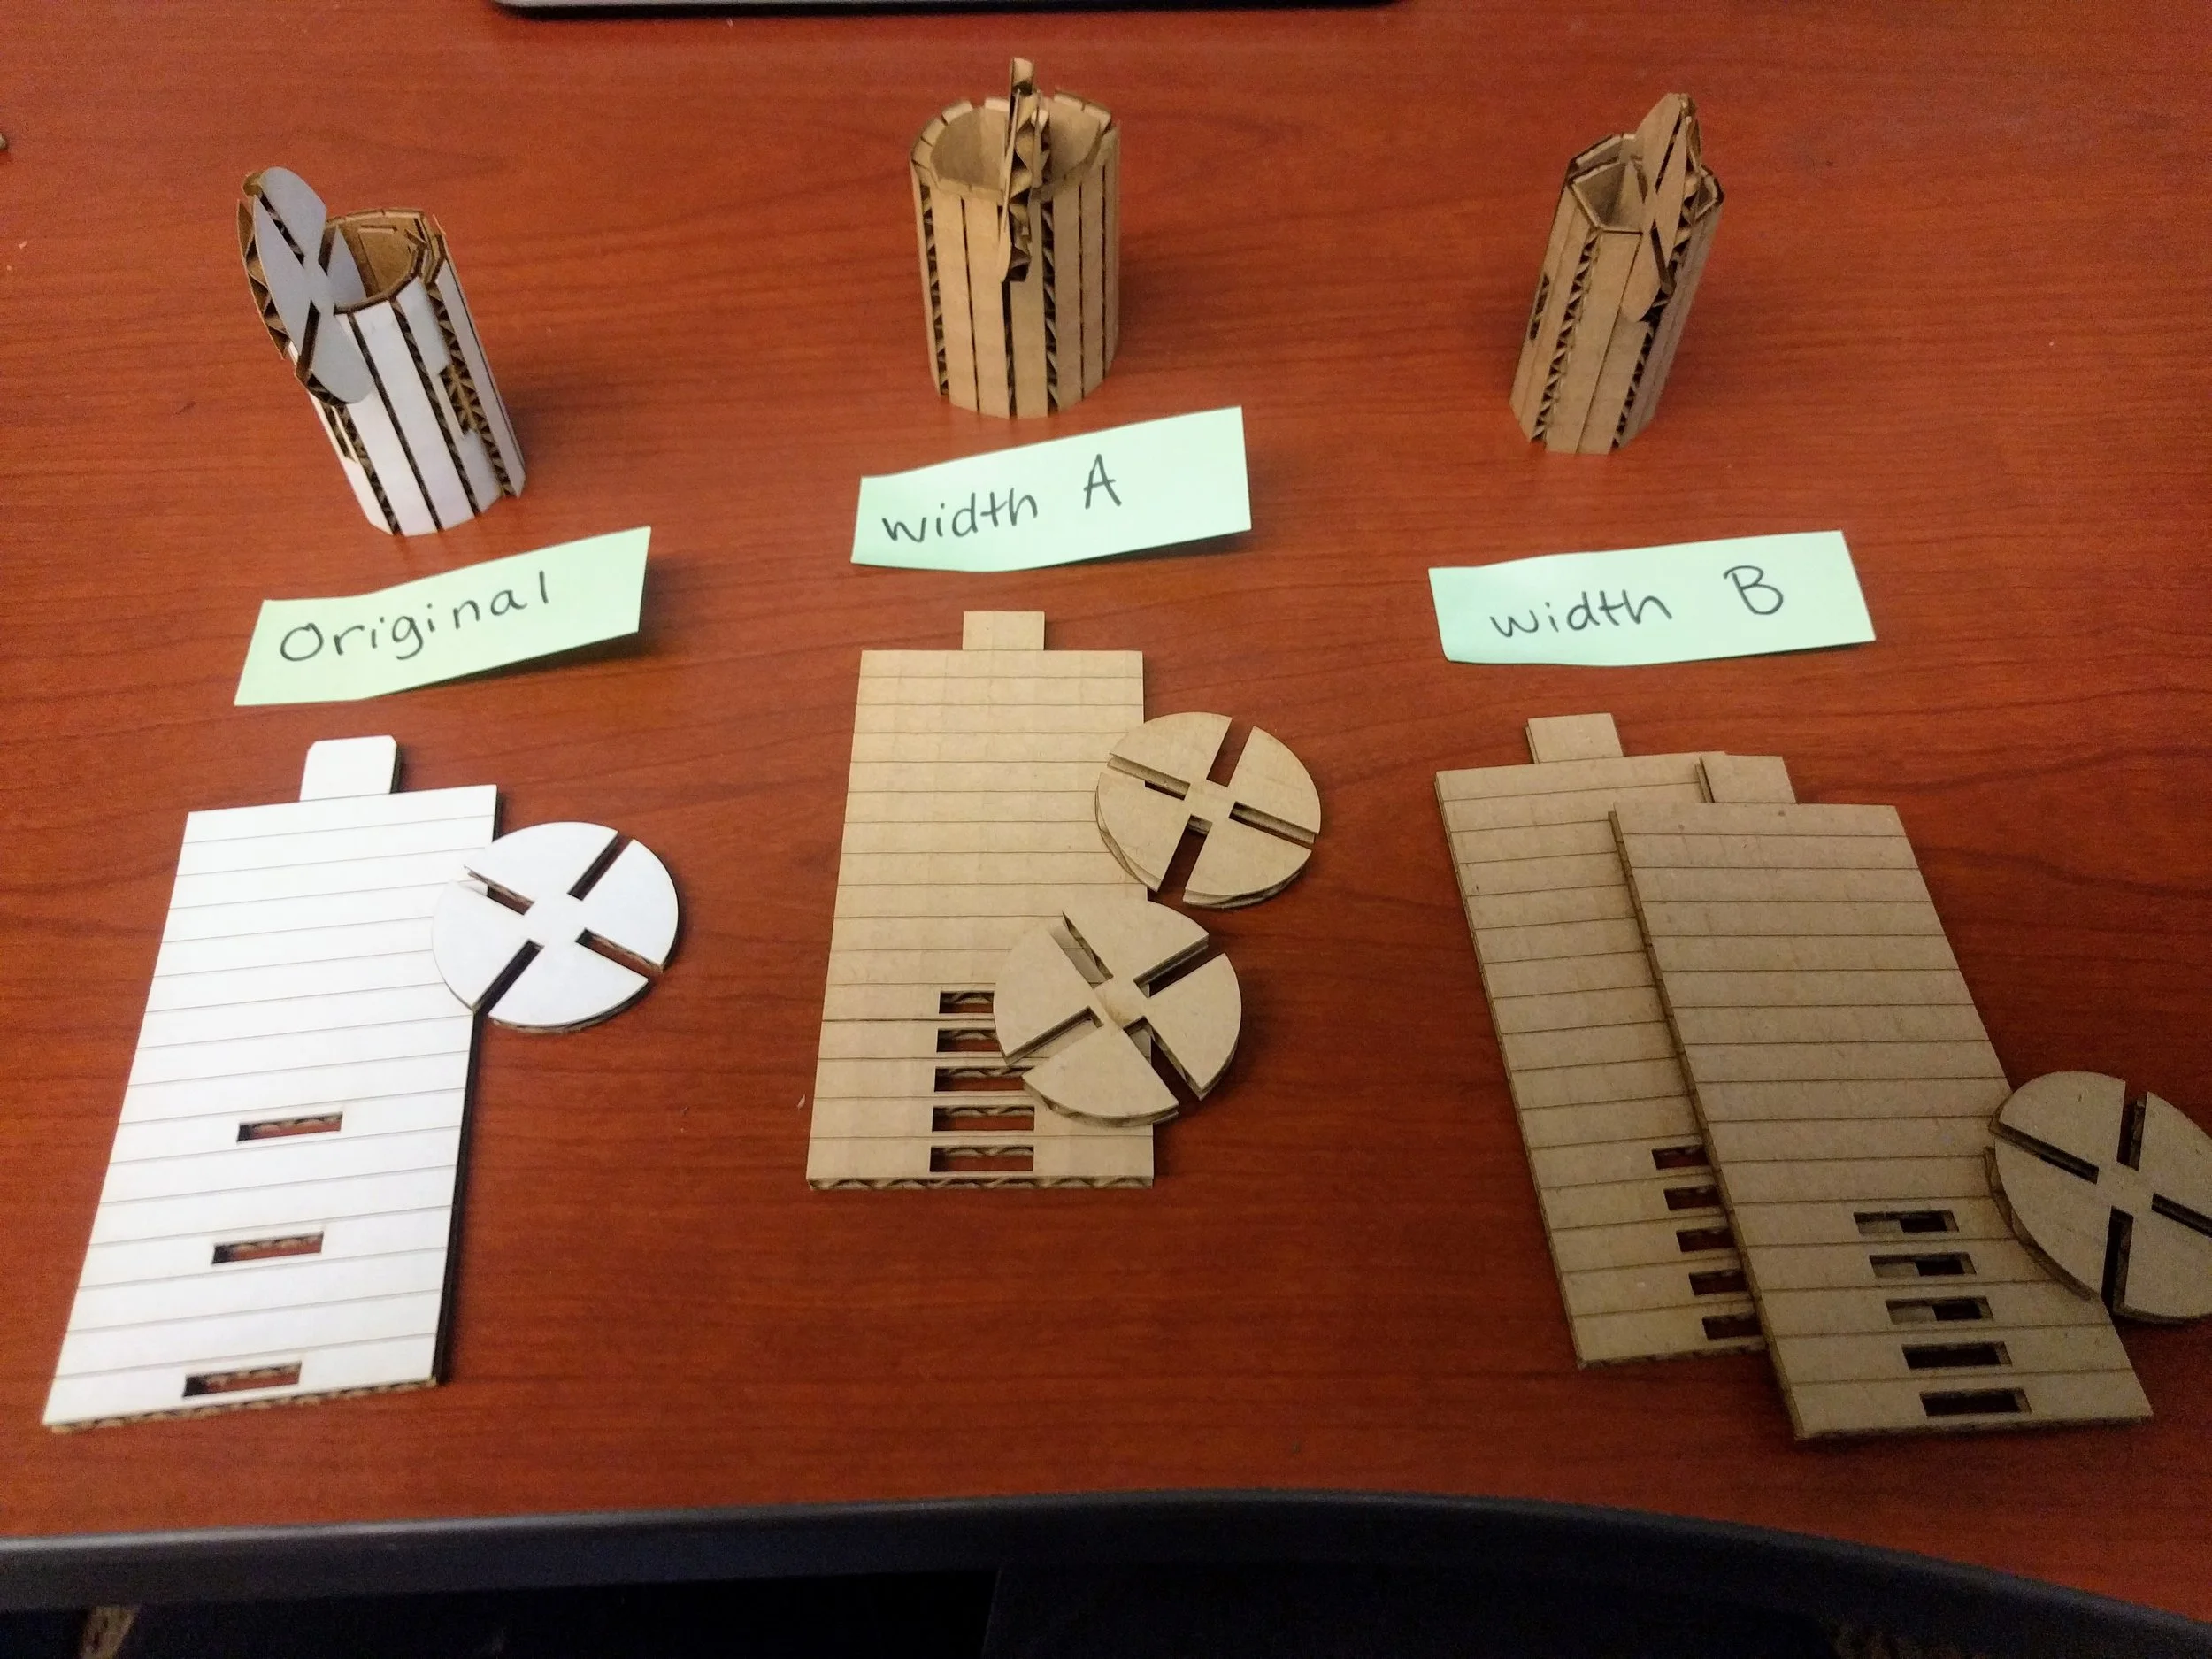
With my parameterized file, the kit can easily be customized to any size cardboard on hand.
The Monster Catcher
The Monster Catcher is a nightlight that catches monsters! The light goes under the bed and if a monster is down there, it will chomp on it and trap it inside the light. You can rest assured that there are no monsters to disturb you in the night. See the whole Instructable here.
Sketching
Before building anything. I made a sketch of what I thought the monster catcher would look like and how it would work.

A sketch of the Monster Catcher made before any physical building began.
Cardboard Prototype
An important part of rapid prototyping is starting with low-fidelity construction to test out your ideas. I started with a cardboard version of the Monster Catcher and hooked it up to electronics powered by an Arduino. I was especially interested in testing the trap door mechanism.
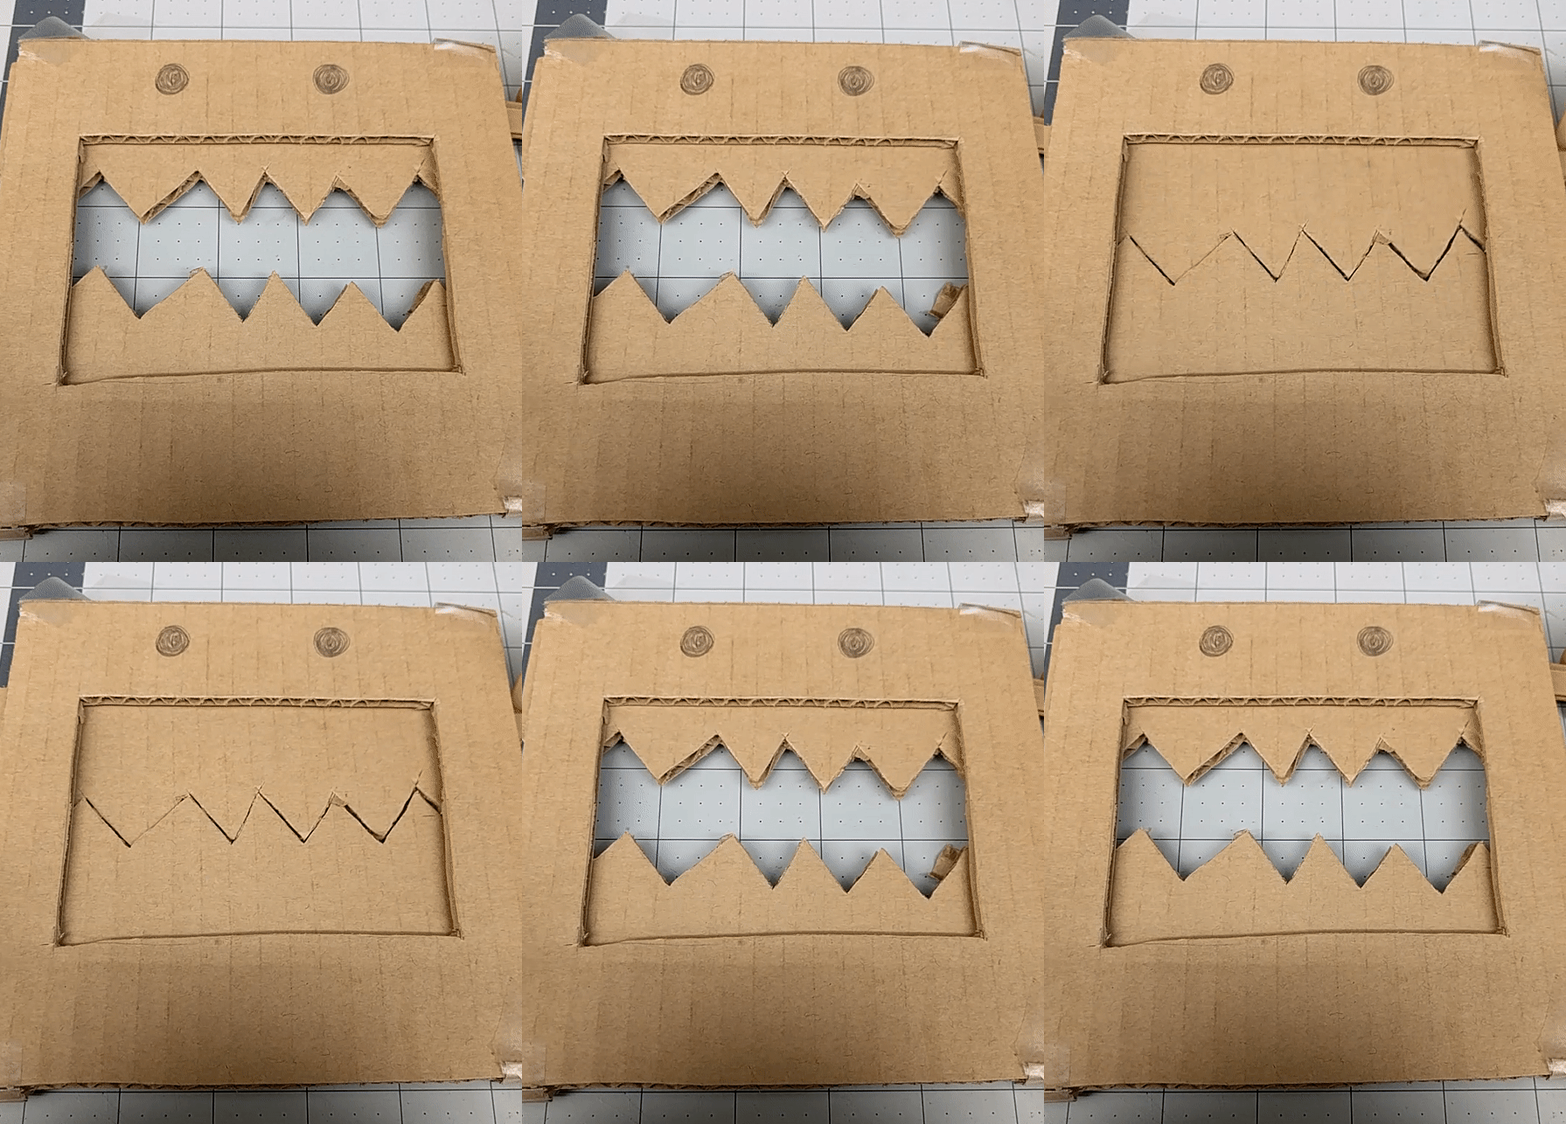
A low-fidelity prototype of the Monster Catcher’s trap door mouth made with cardboard.
Choosing a Mechanism
I researched several different mechanisms to find the right one for my sliding teeth. The slider-crank mechanism powered by a servo motor was a good fit.
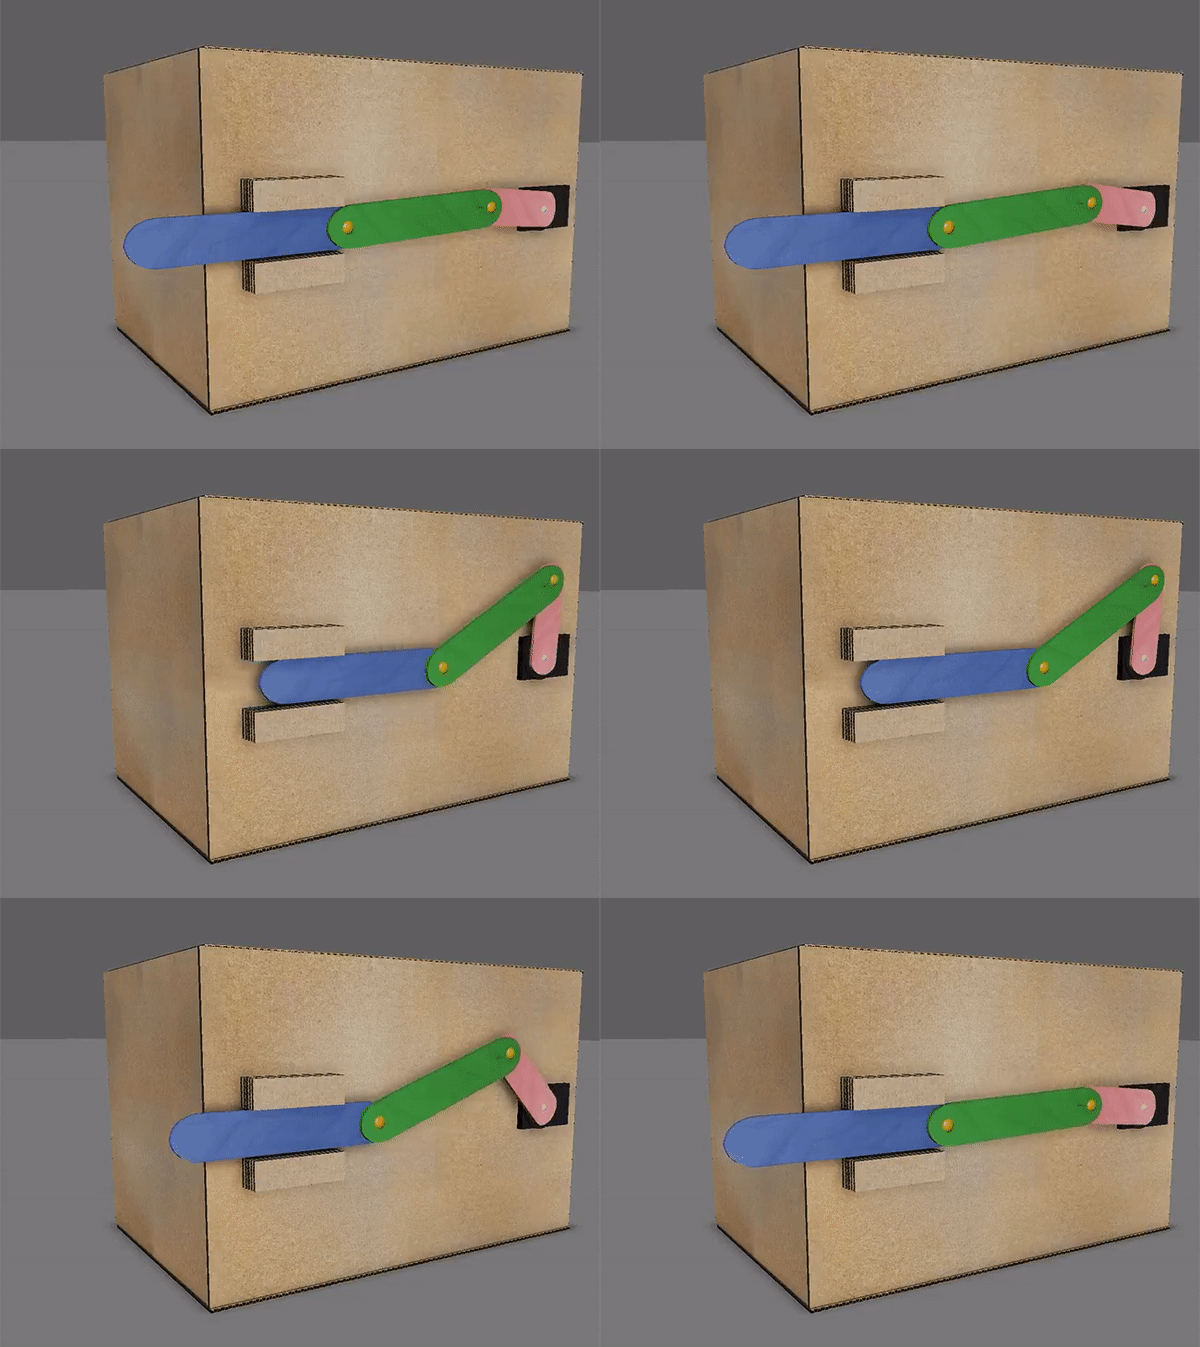
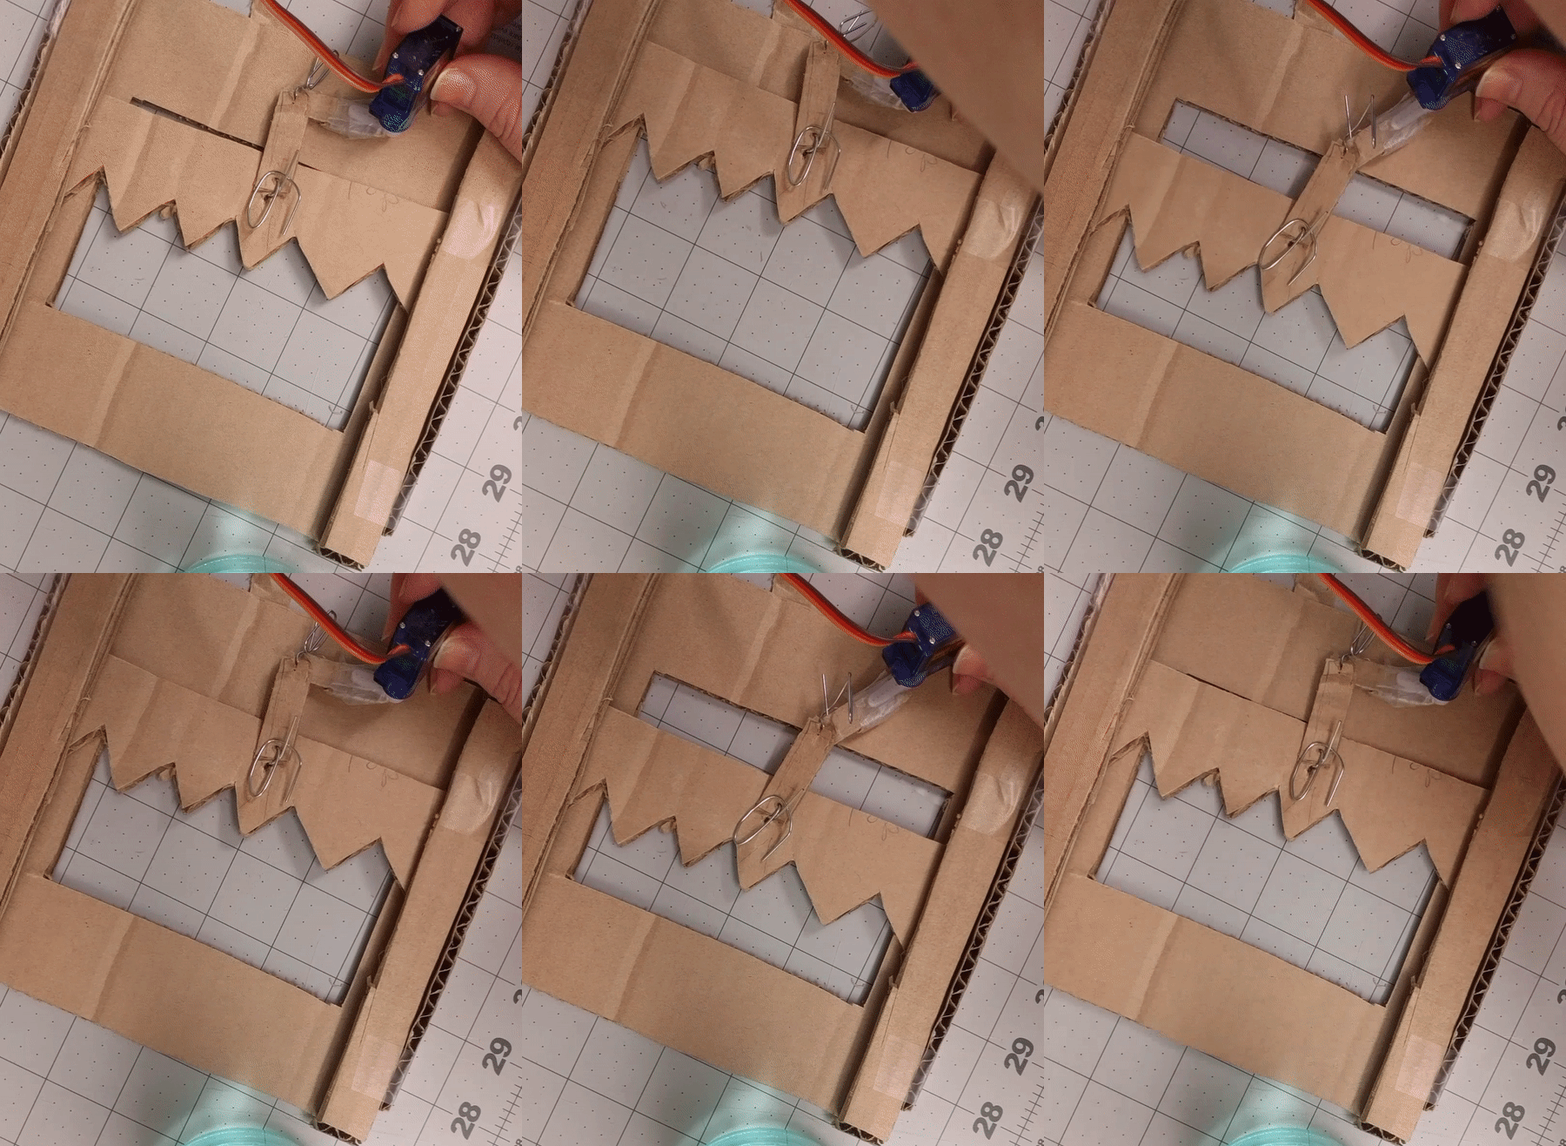
A visualization of the slider-crank mechanism and the slider-crank mechanism in action on the cardboard prototype.
3D Printed Live Hinge
I then moved up in fidelity to some 3D printed parts. As is also important in rapid prototyping, I worked on CADing and printing small parts at a time. The most interesting 3D printed parts of the Monster Catcher were the hinges for its teeth. I designed the scissor hinges to print as one part but still work as a moving hinge, no assembly required. I used dissolvable supports for the design.
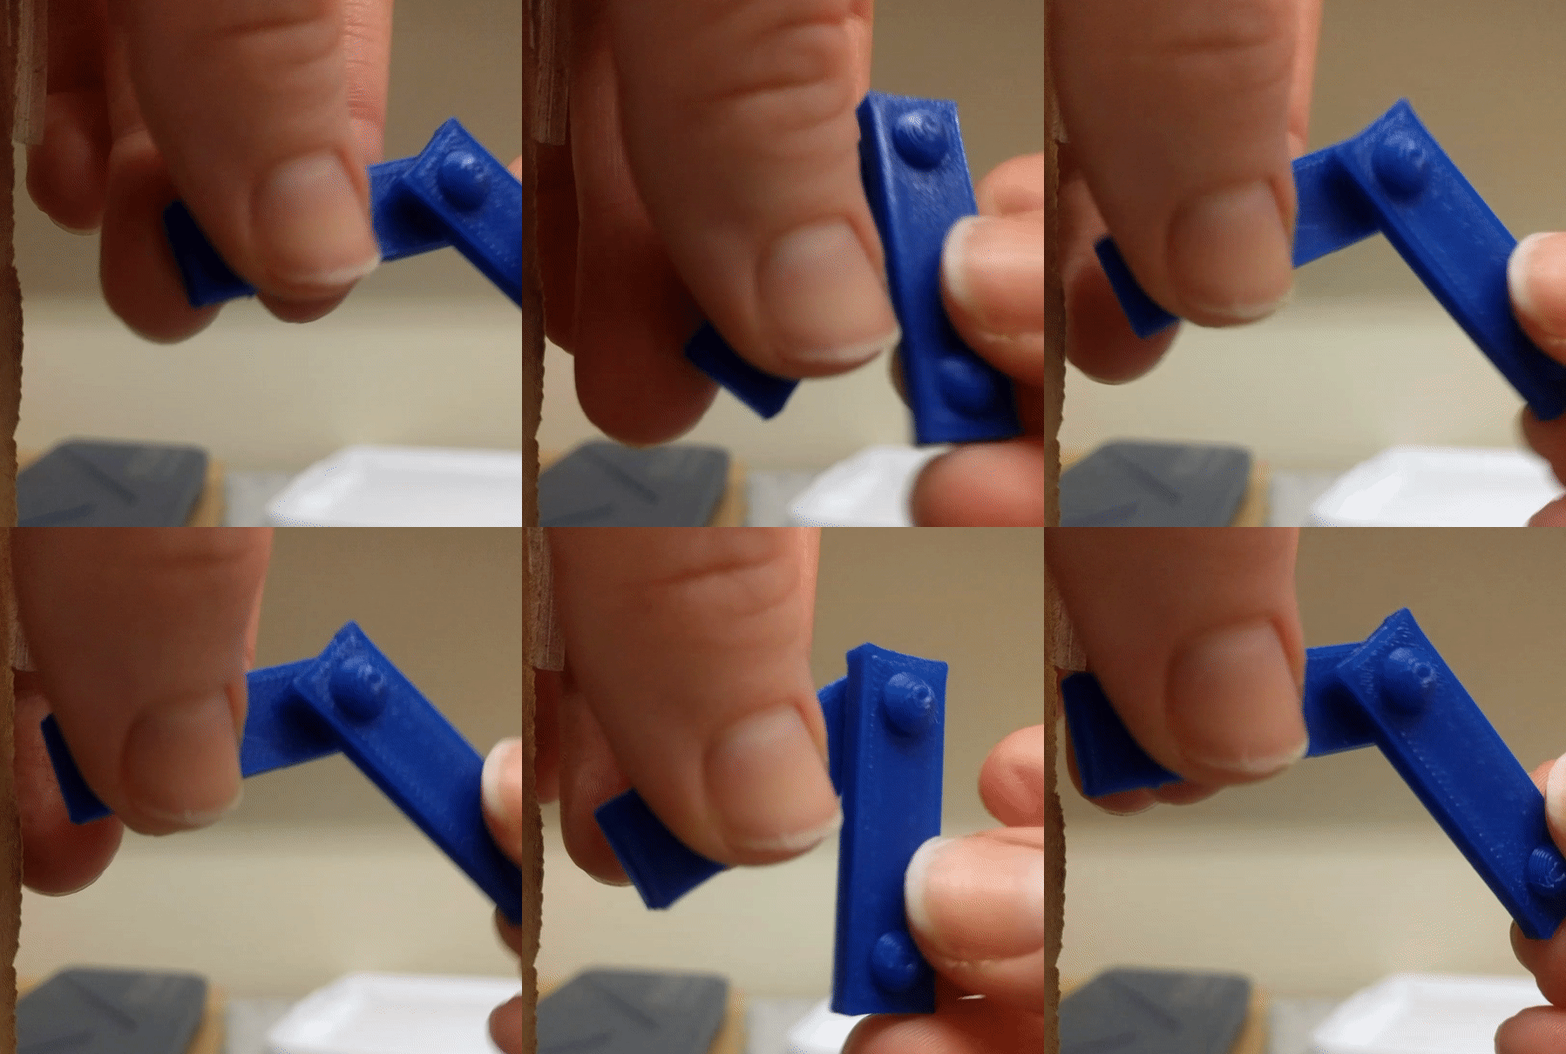
A prototype of a 3D printable live hinge that I designed that will print in place and doesn’t require assembly.
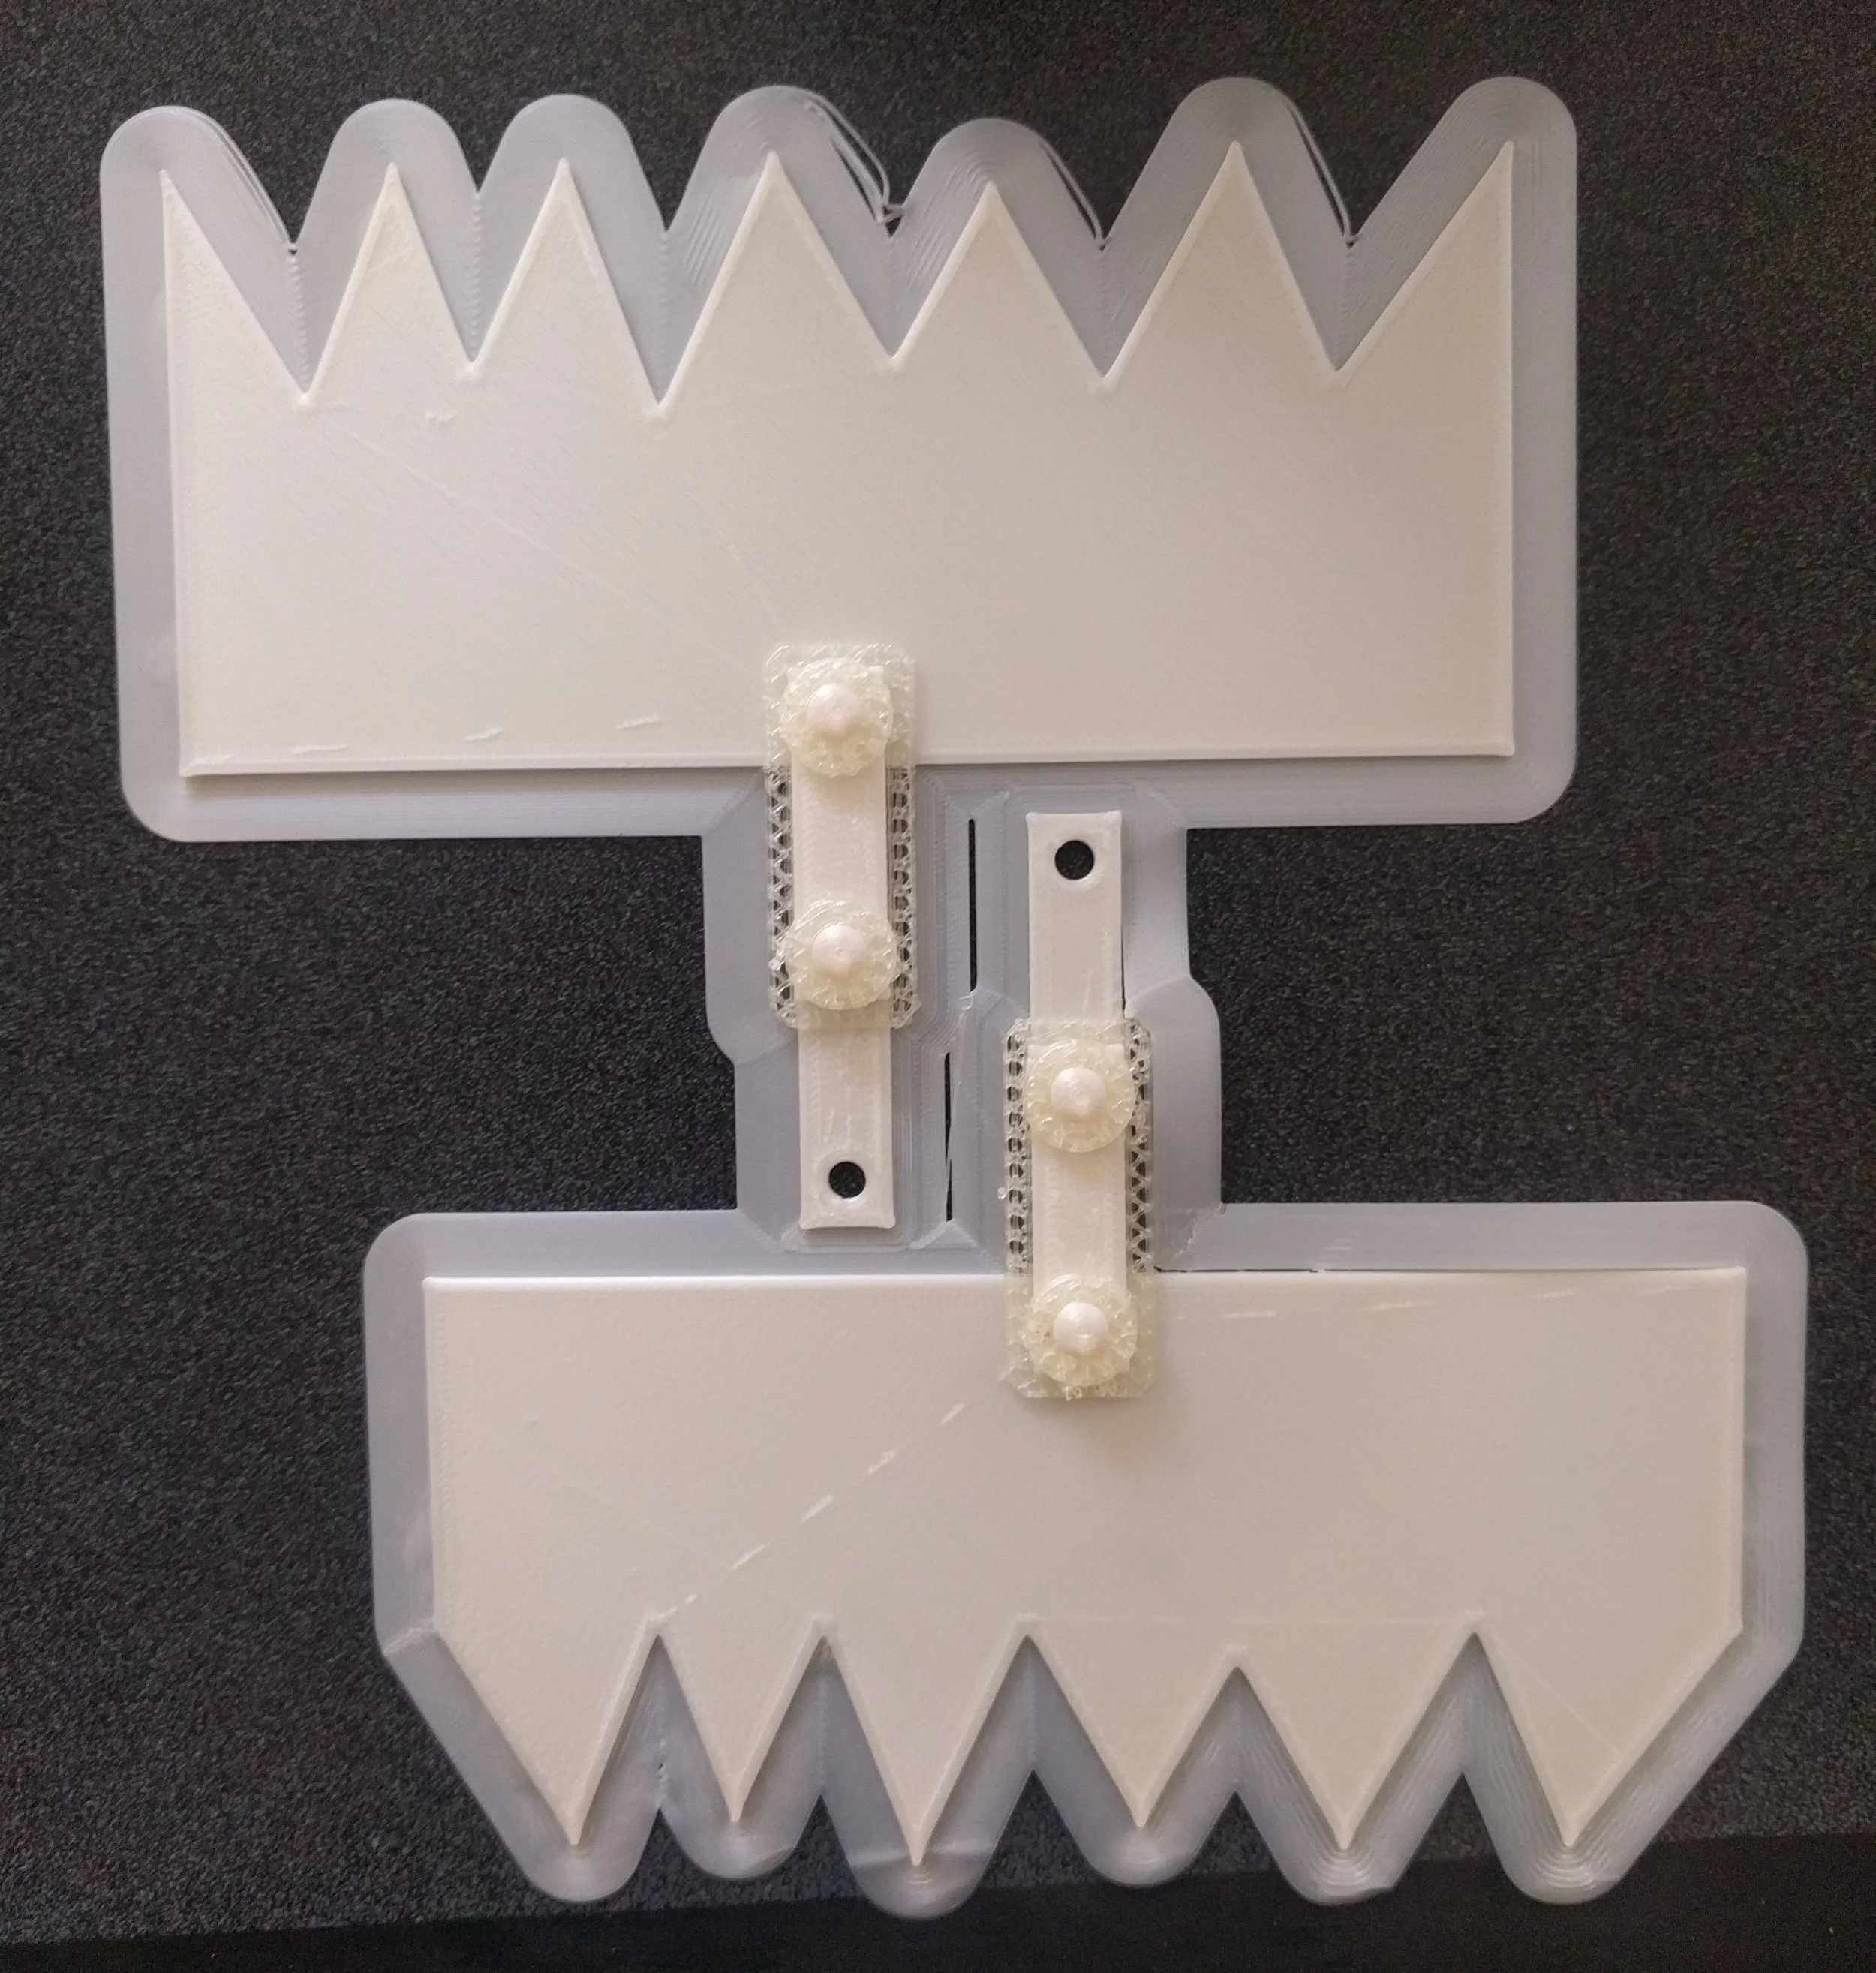
The final 3D printed hinges attached to the teeth. You can see the dissolvable supports around the hinges which will be soaked away in warm water.
Laser Cut Body
The body of the Monster Catcher is made of laser cut acrylic that then had a frosted stick-on layer applied to it. I chose laser cutting for this part because it is much faster than 3D printing and can get the job done. The box was held together with finger joints.
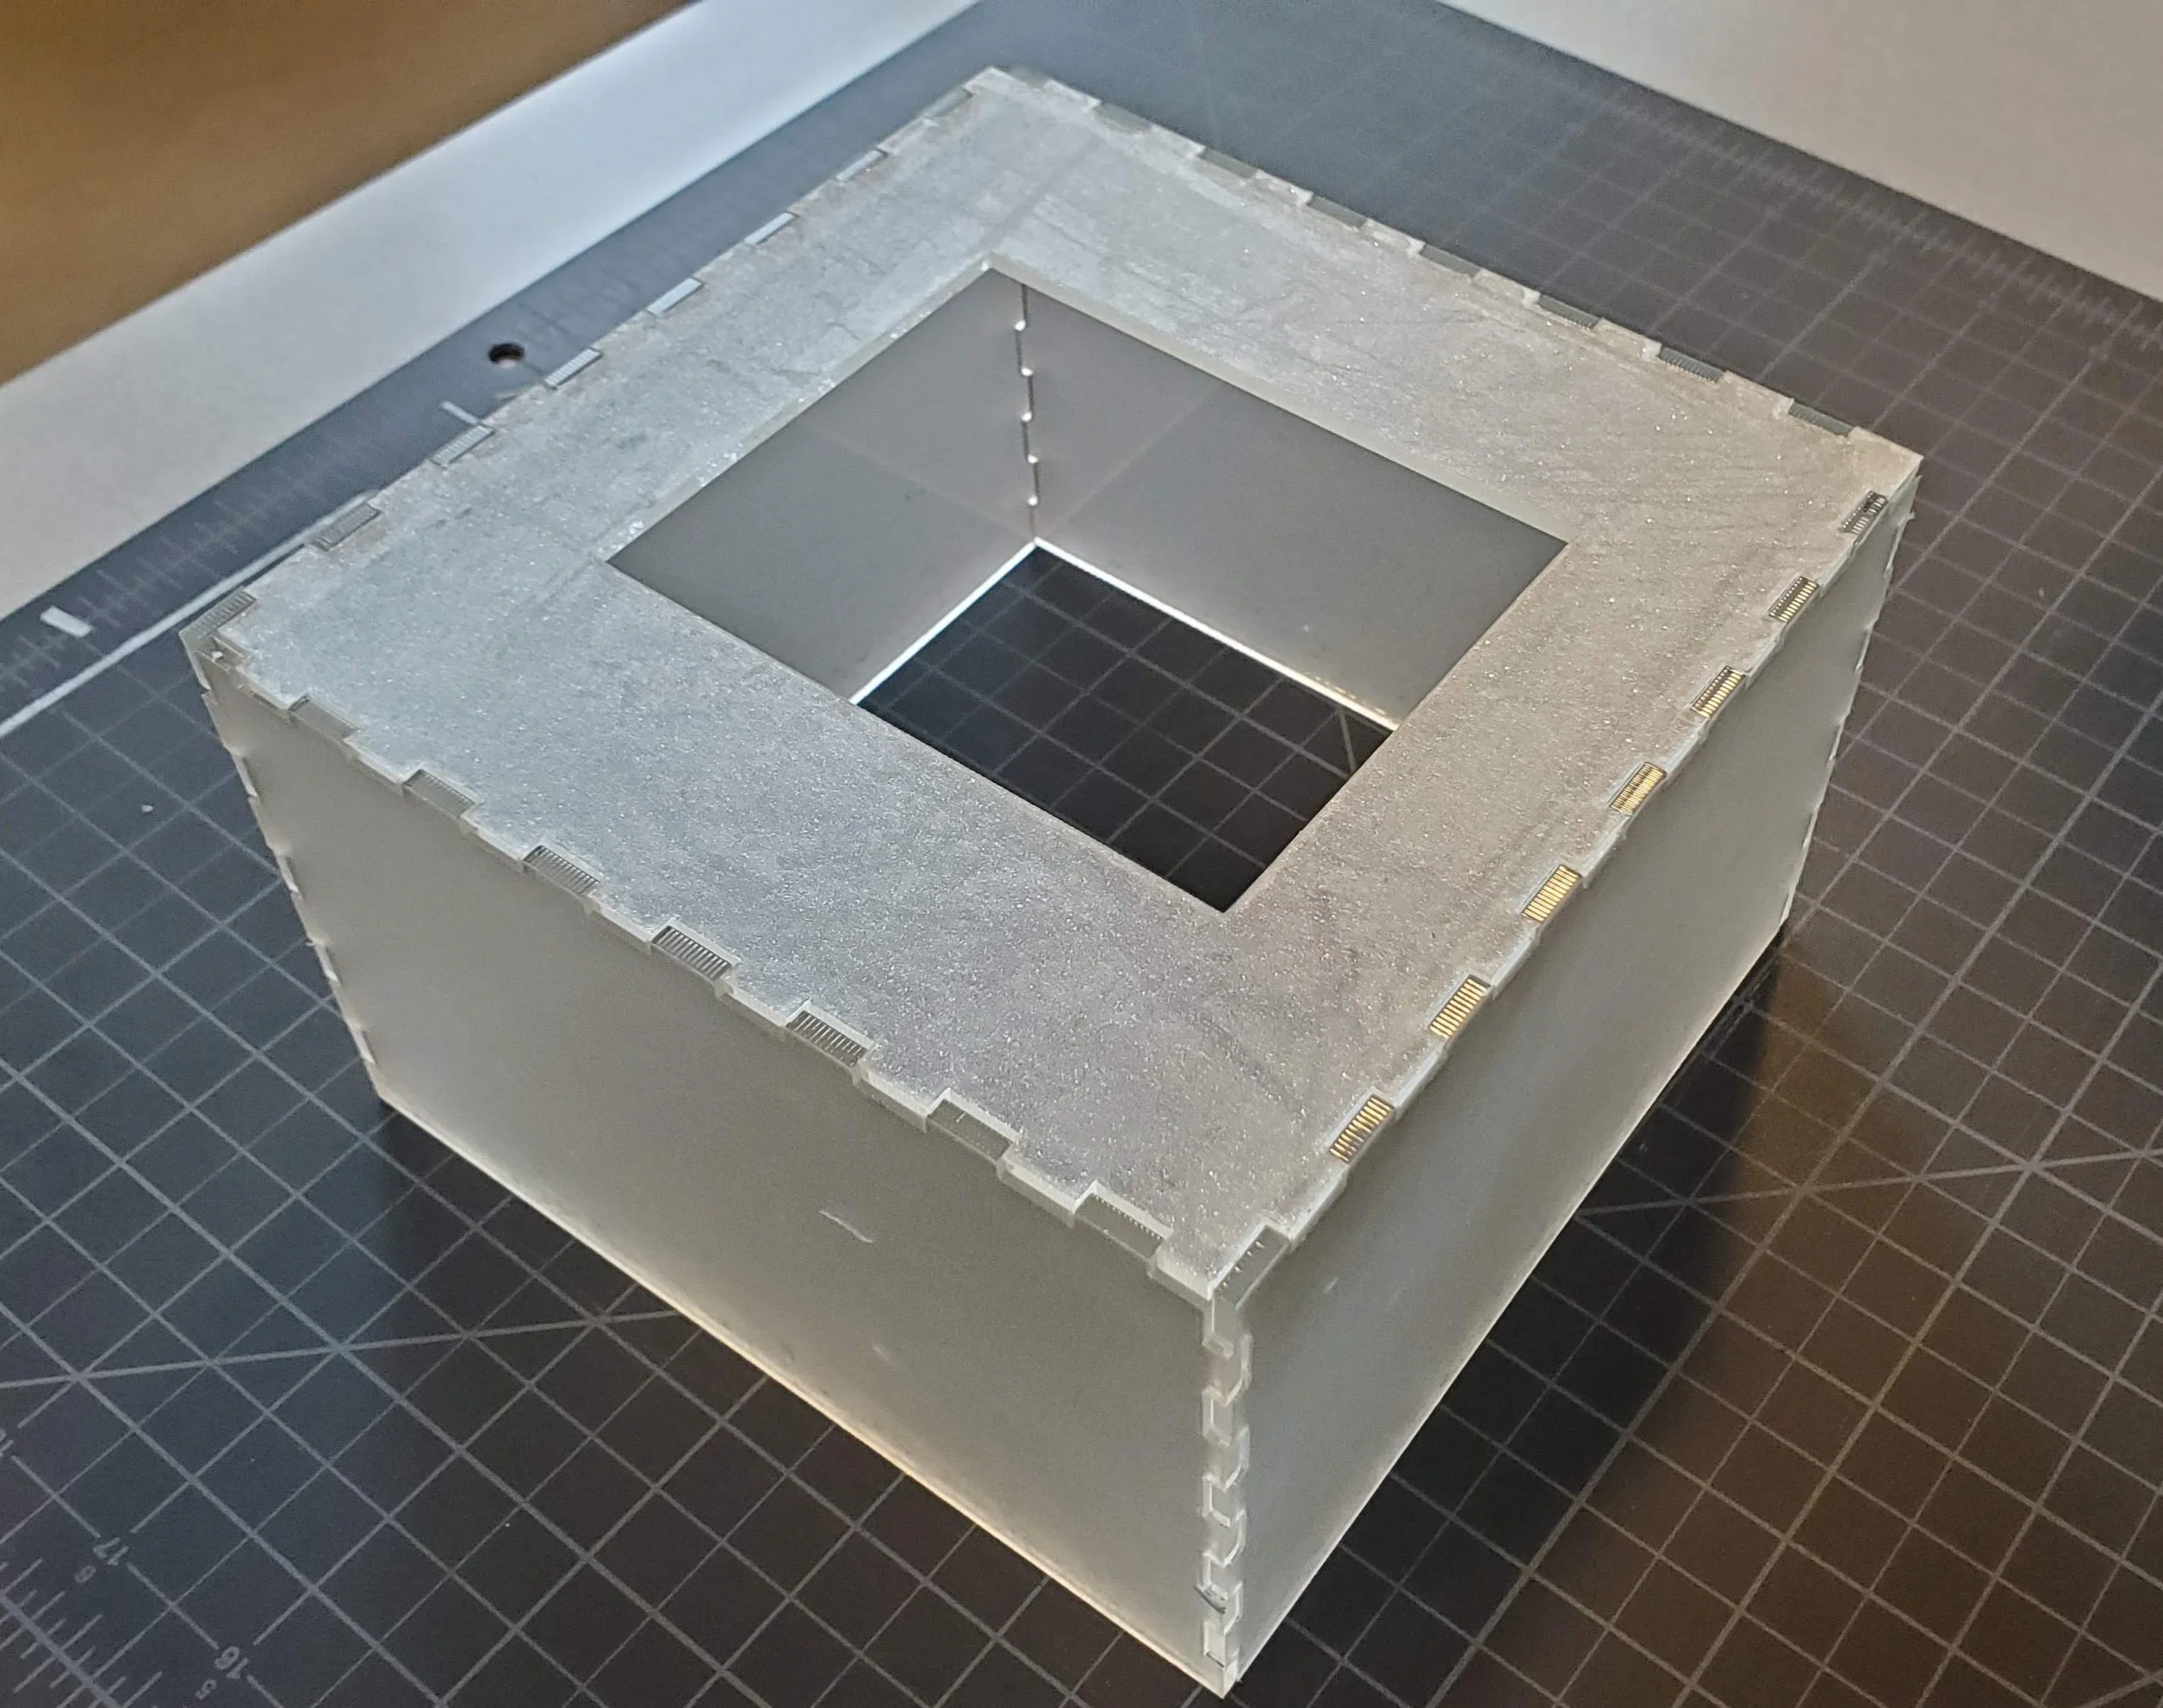
The laser cut acrylic body of the Monster Catcher with a stick-on frosted effect to diffuse the light.
The Circuit
I designed the circuit myself and coded the Arduino. The Arduino runs the two servo motors that move the teeth, as well as an RGB LED inside. I made these available in my Instructable to make it easier for kids to recreate the project.
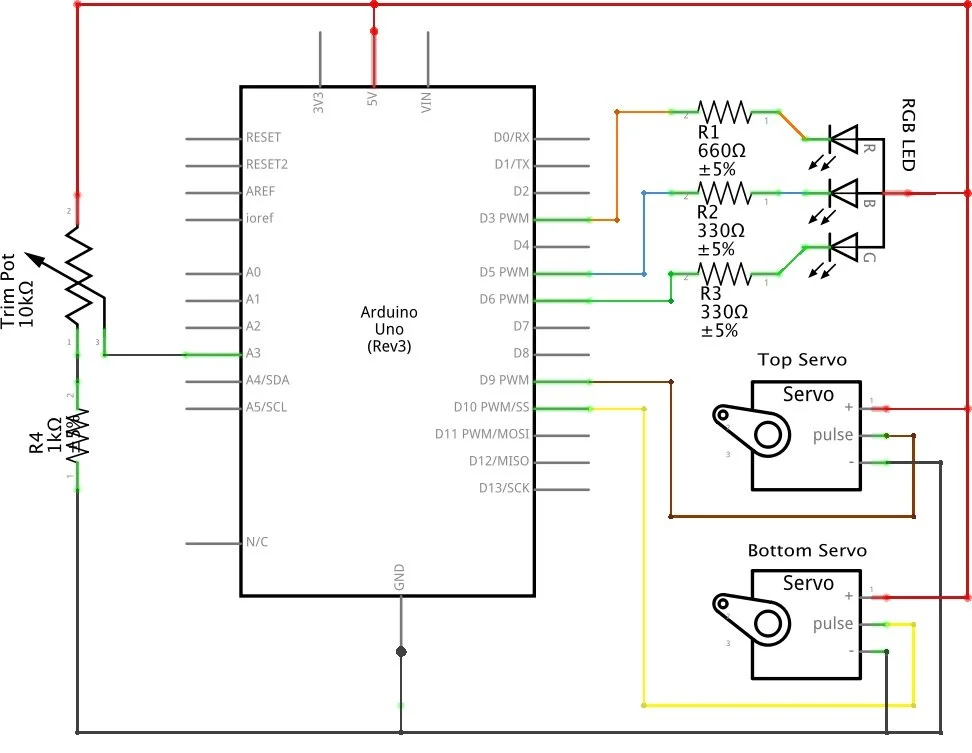
A schematic of the Monster Catcher circuit.
Final Assembly
All the electronics are hidden beneath an internal board made of the same frosted acrylic as the outside, allowing the light to shine through. The teeth sit on top of the board but underneath the top of the box.
The final assembled Monster Catcher.
Recogition
The Monster Catcher became a Featured Project on Instructables.
“Such a fun idea and a super awesome family tech project. Thanks for sharing!”